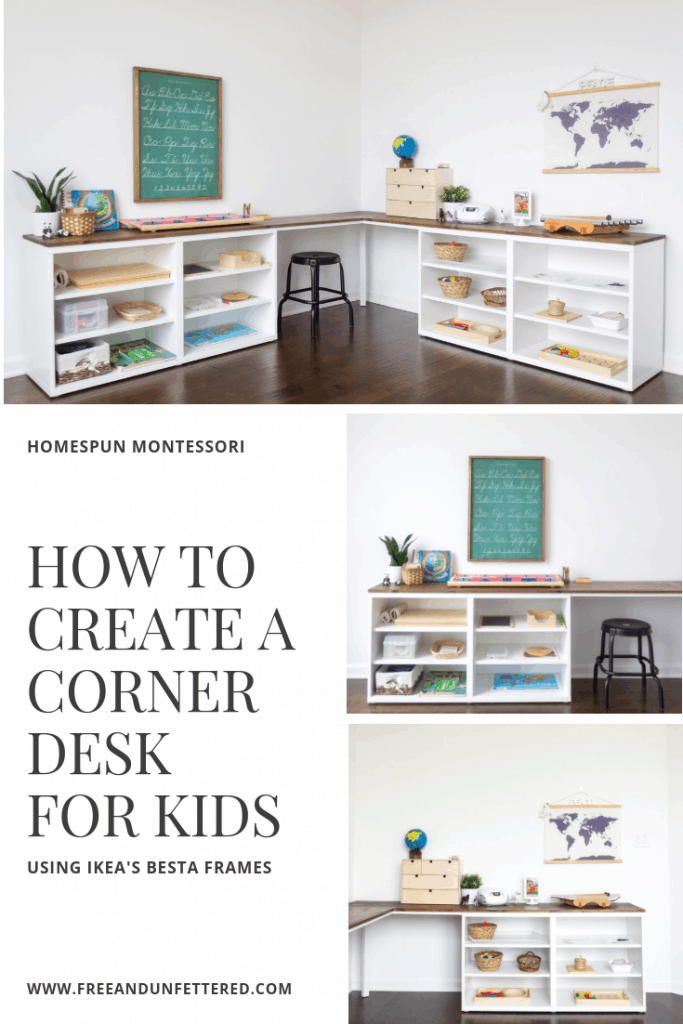
IKEA HACK: Create a Corner Desktop for Kids Using Besta Shelves
If you’re looking for a space-saving corner desk that offers a TON of storage, look no further! Keep reading to find a complete step-by-step tutorial detailing how to easily build a corner desk using off-the-shelf BESTA units from IKEA.

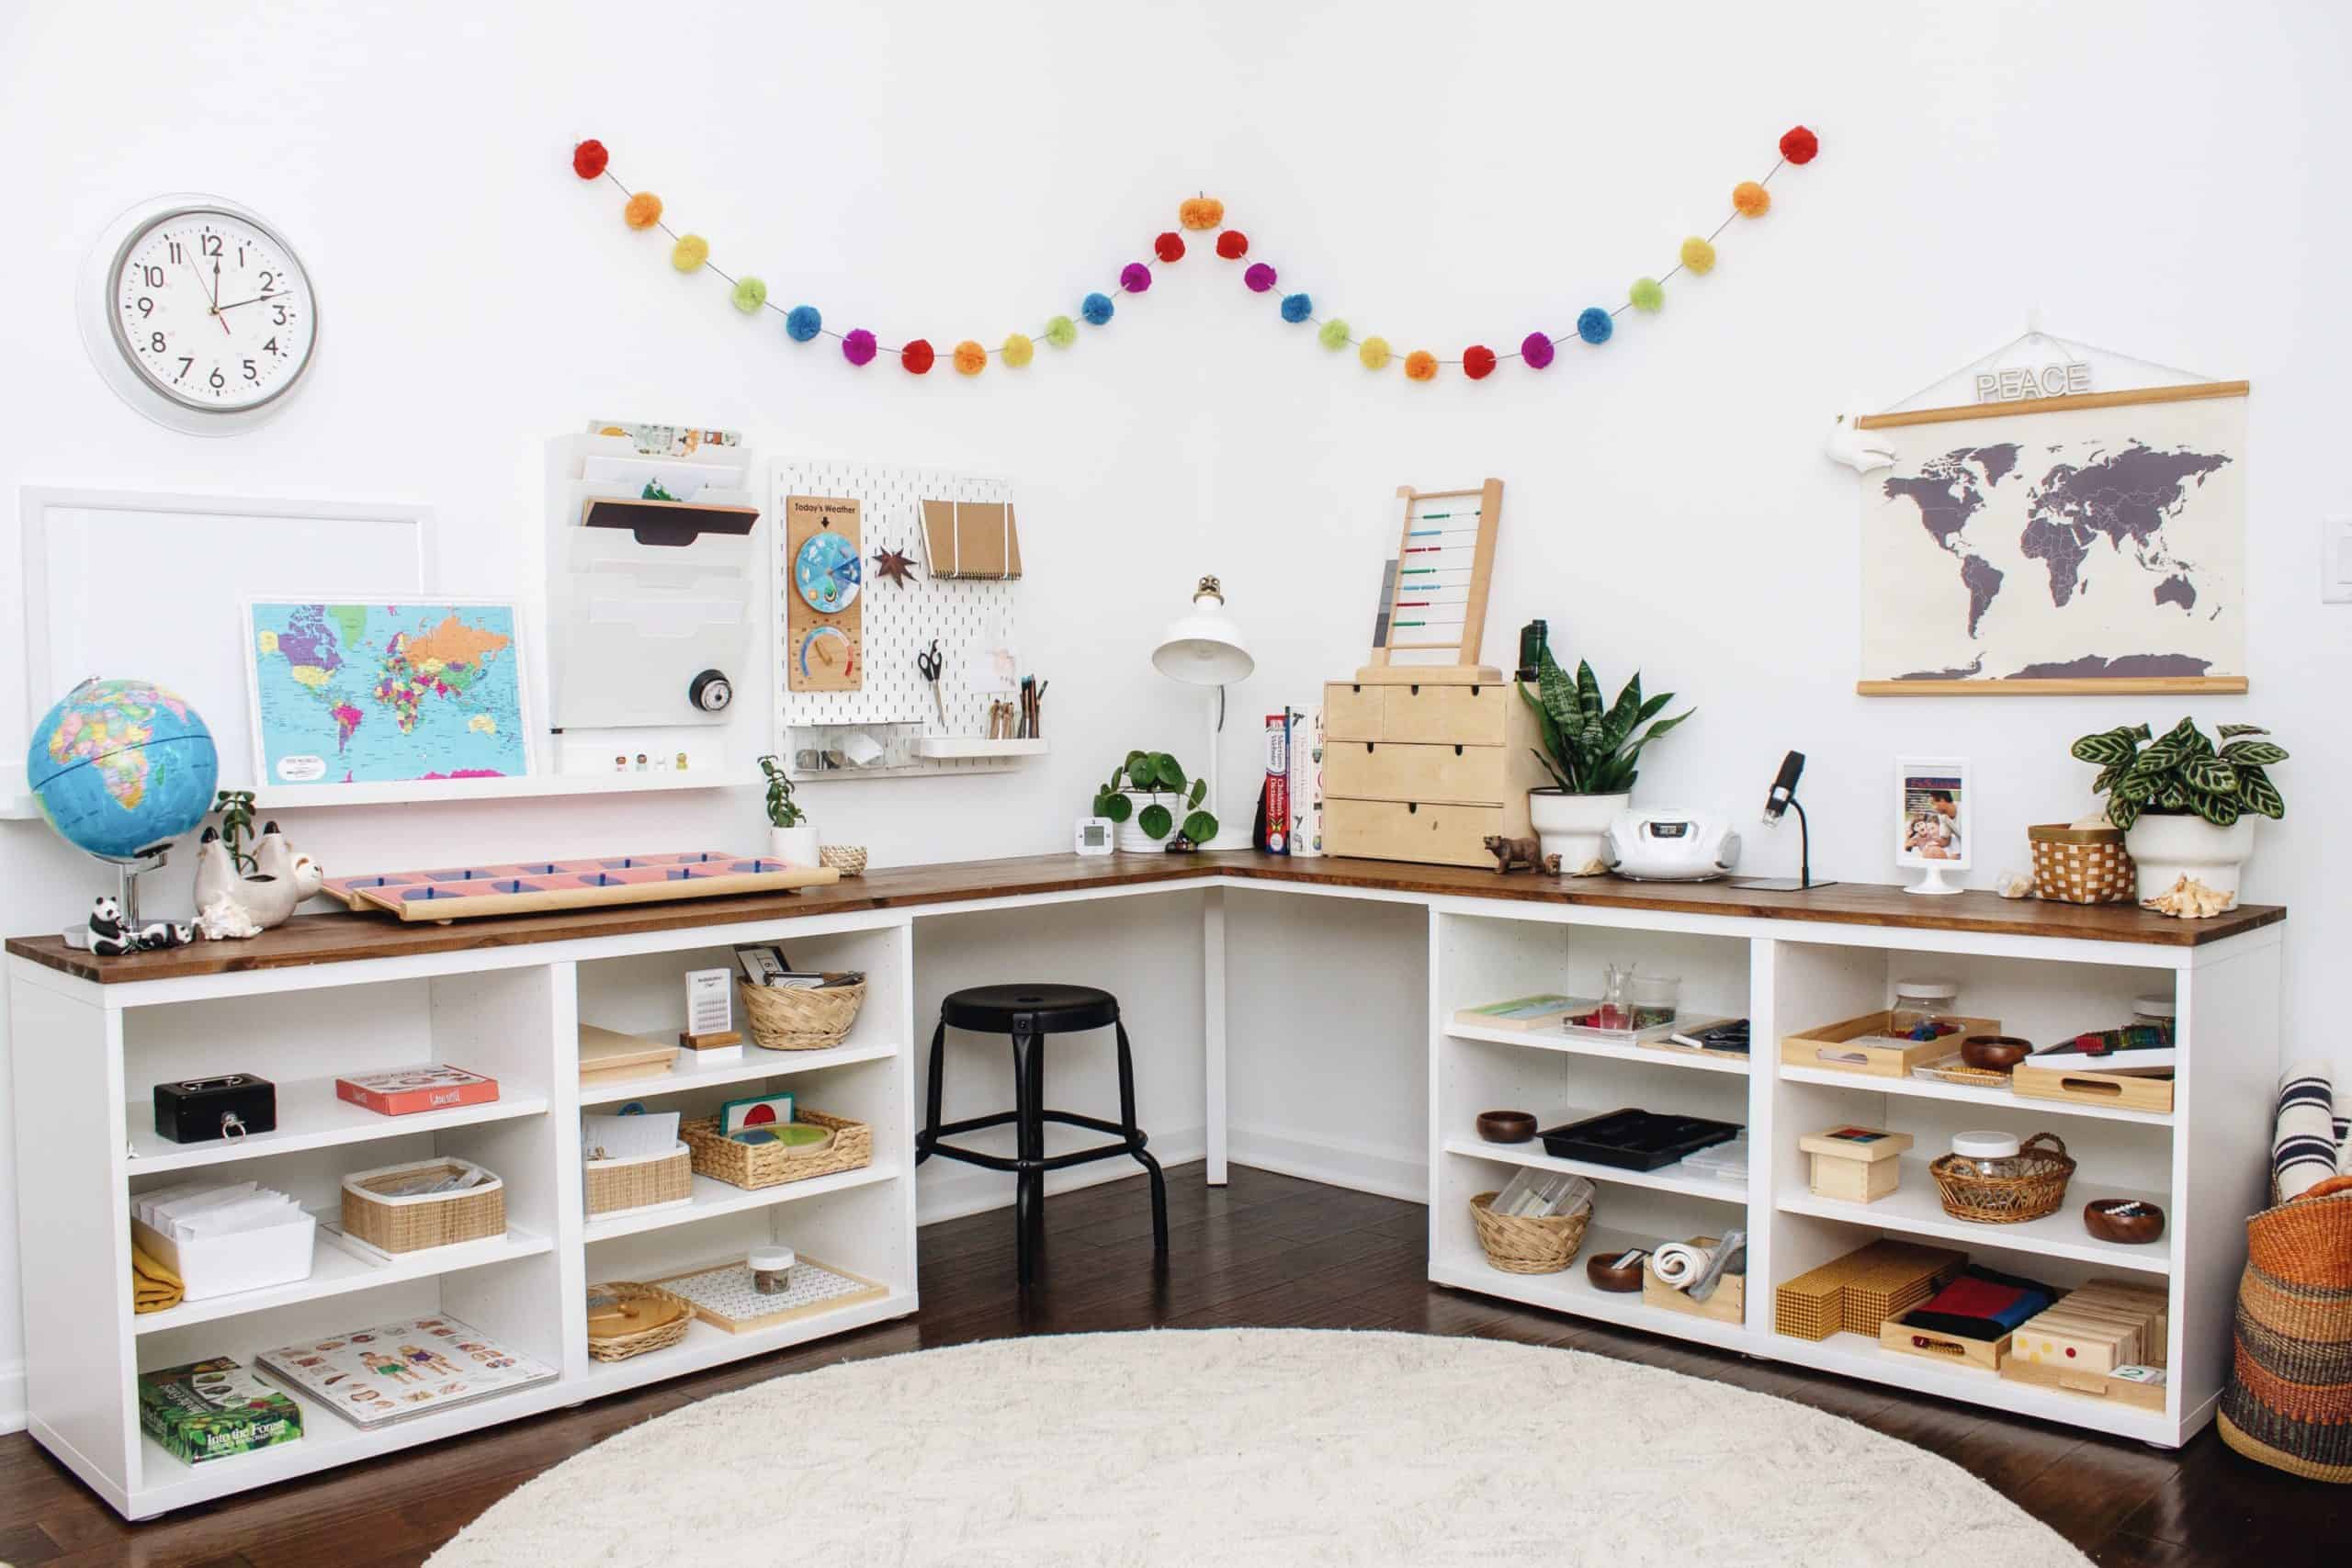
It’s been a couple weeks since we finished our corner desktop in the schoolroom, and I have to say I really, really love how it turned out. More importantly, though, it’s serving our children’s needs well.
When we first walked through our new home, we both immediately agreed the third bedroom would make a great schooolroom. It has plenty of natural light thanks to a large window that spans almost the entire length of one wall.
Plus, it has an oversized closet — at least I consider it oversized compared to the itty bitty ones in our former 1920’s home. We’re currently using the closet to store our Montessori math manipulatives, art supplies, and out-of-rotation books and materials. I like that it allows us a place to keep some of the not-so-toddler-friendly Montessori materials we have, but they are still accessible for our older daughter to use.
After we moved in I quickly realized that losing one entire wall to the closet, another to the window, and part of a third wall to the doorway meant having to figure out how best to arrange our homeschool shelving units with somewhat limited wall space.
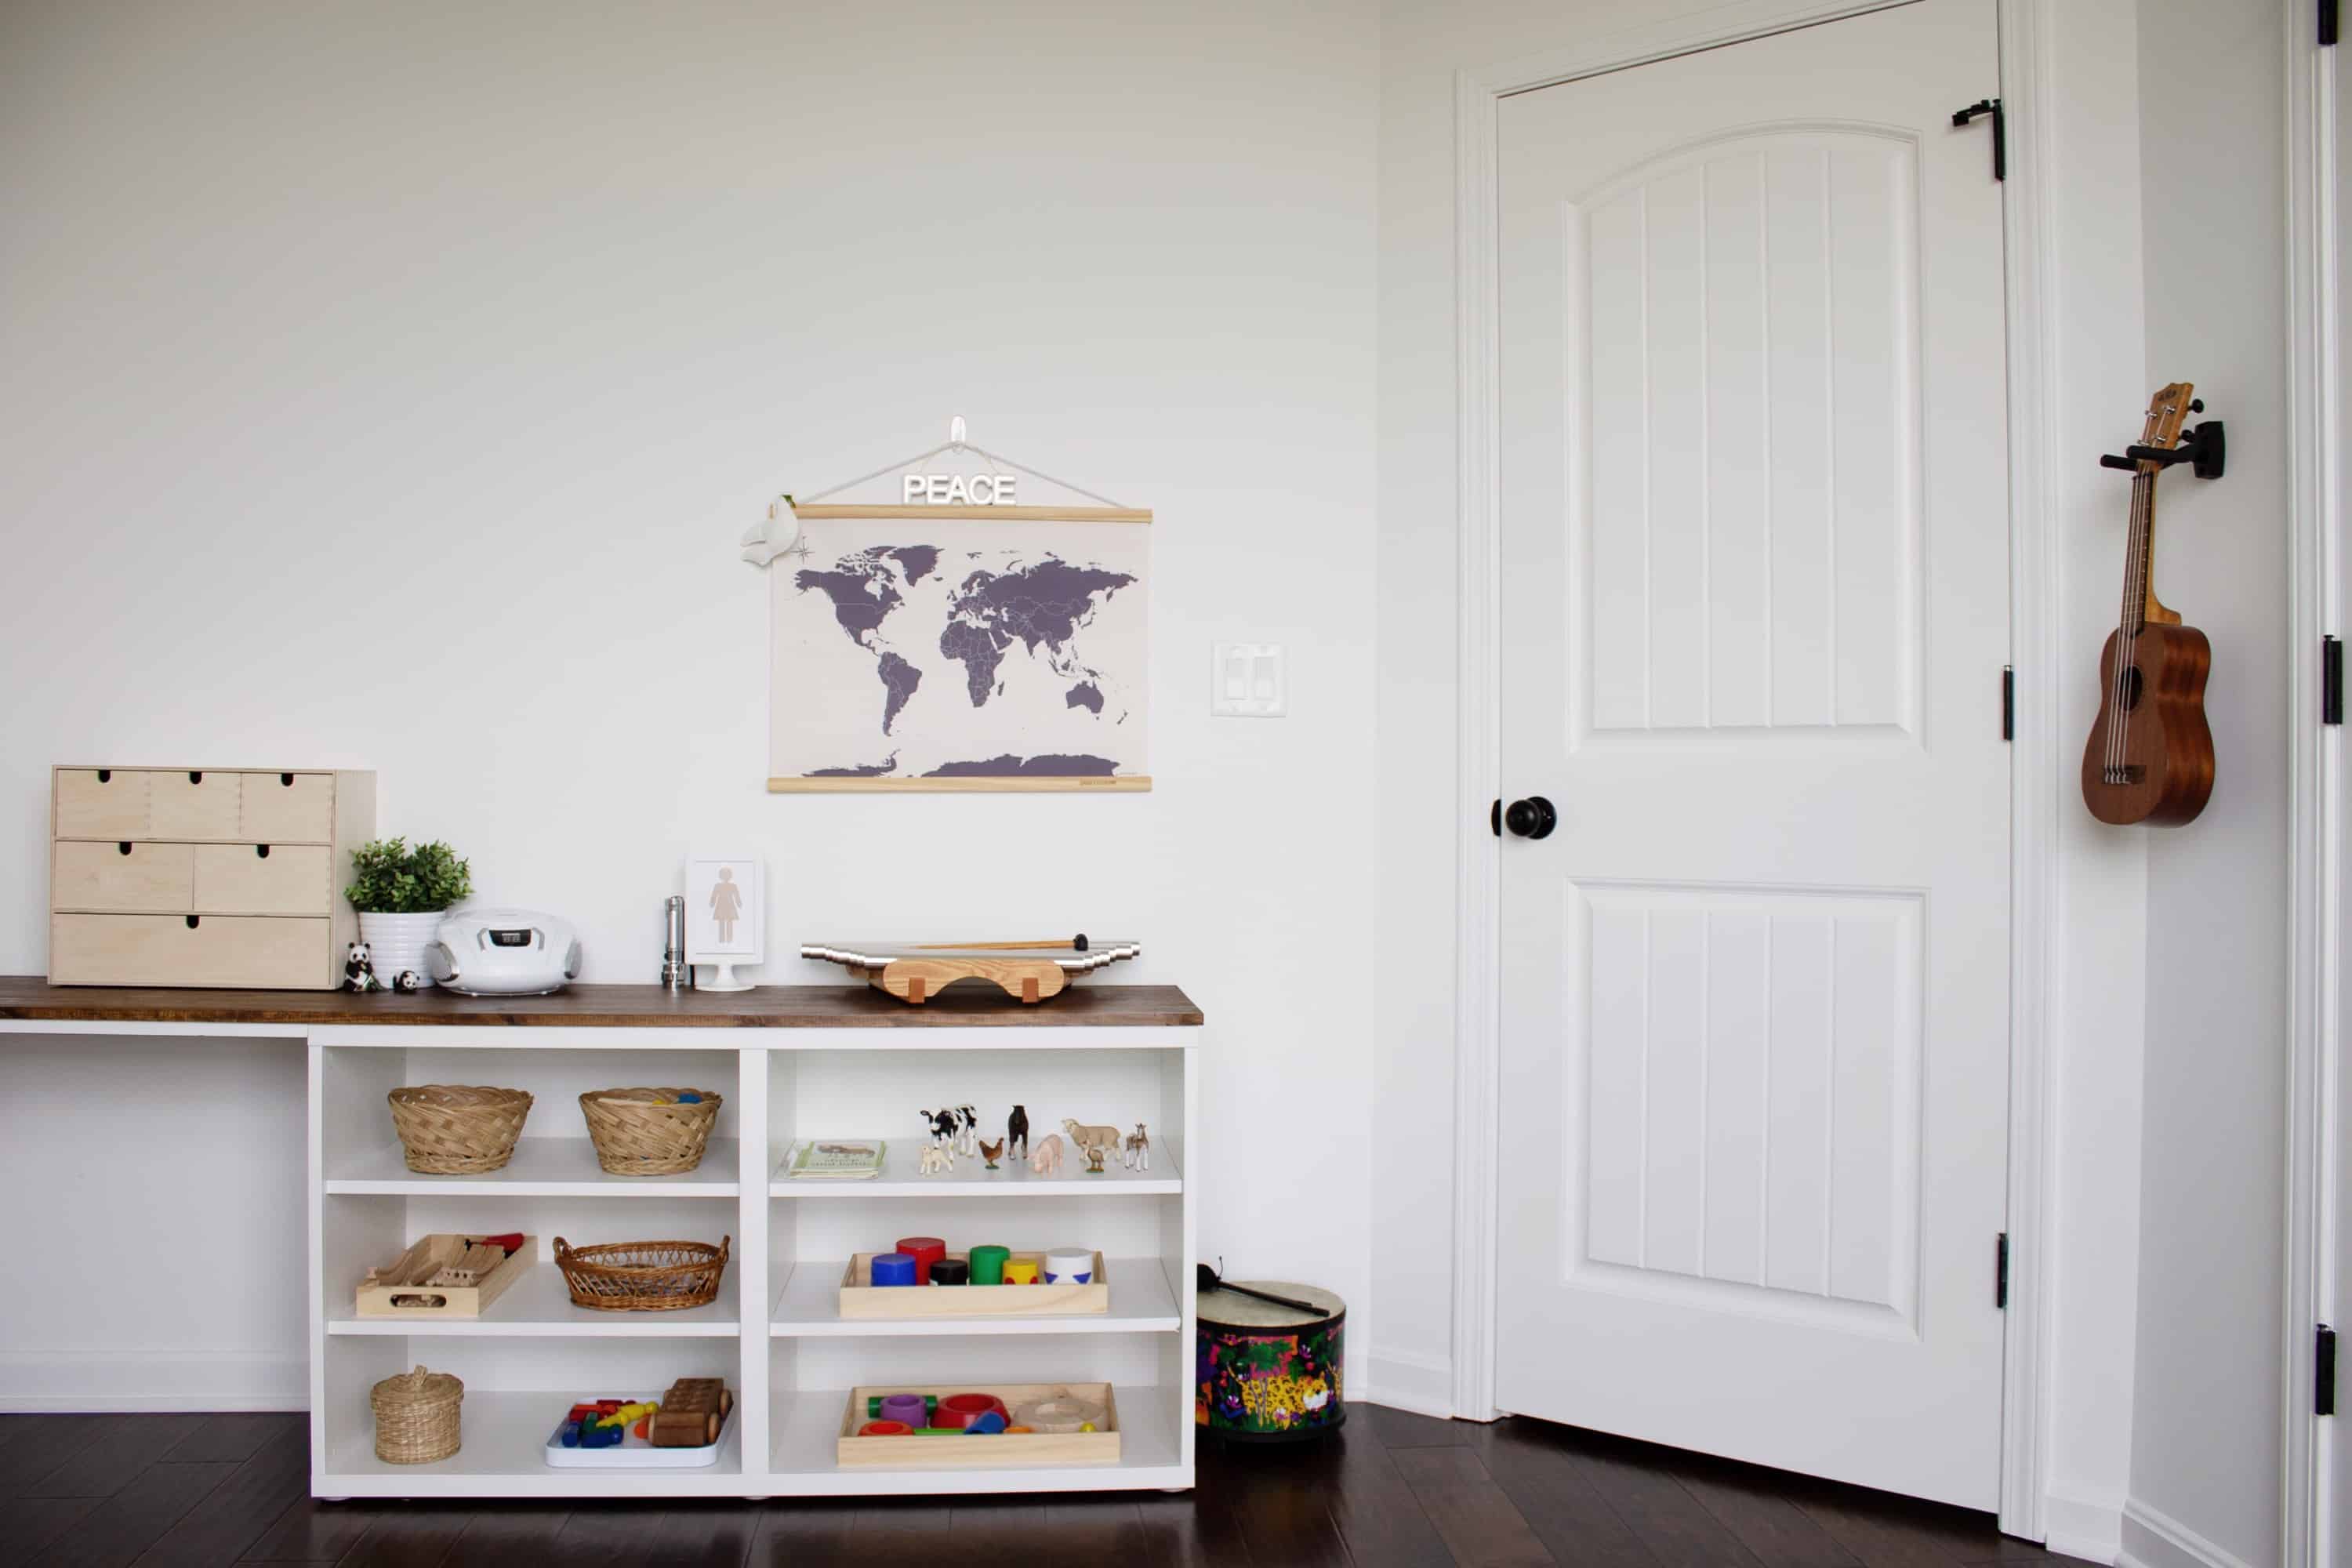
Since we spend so much time working with materials on the floor, I really didn’t want to put a table in the middle of the room. It’s not that big of a room, and I feared a table in the center would literally engulf the entire space. I considered placing a work table between the two shelving units, but the measurements didn’t quite work out unless I wanted to abandon the planned reading nook with cozy chair — hmm, definitely not!
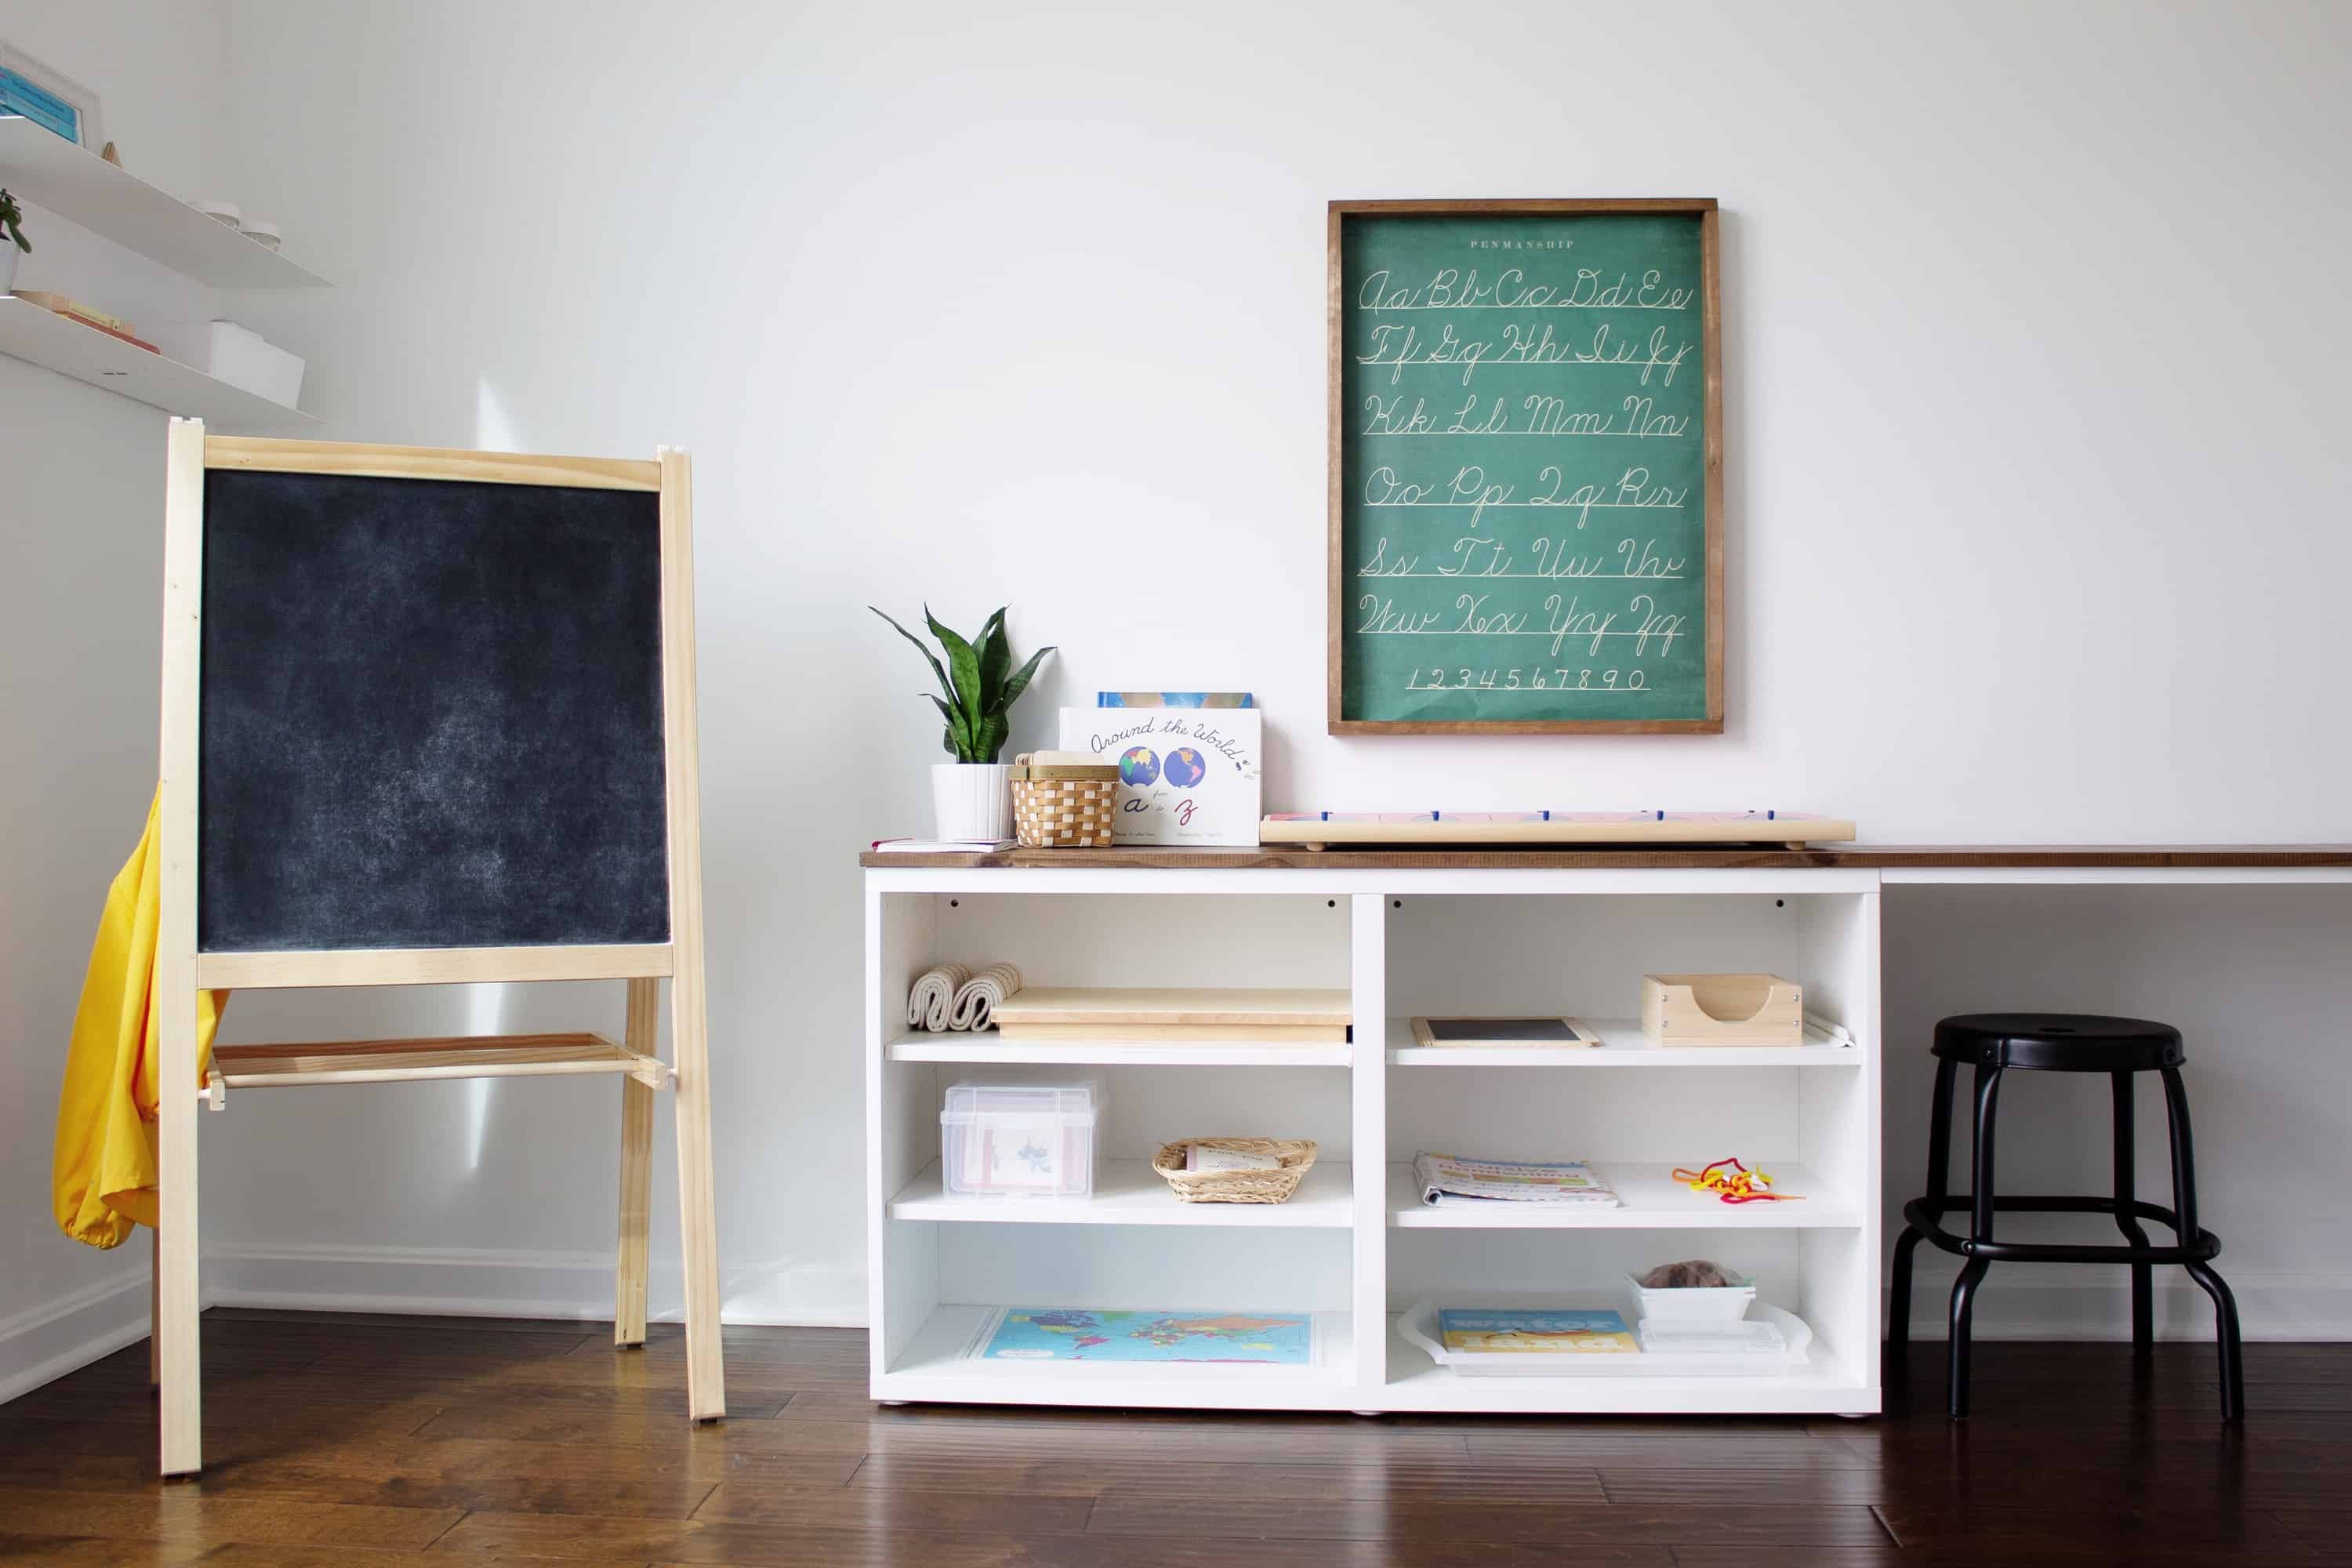
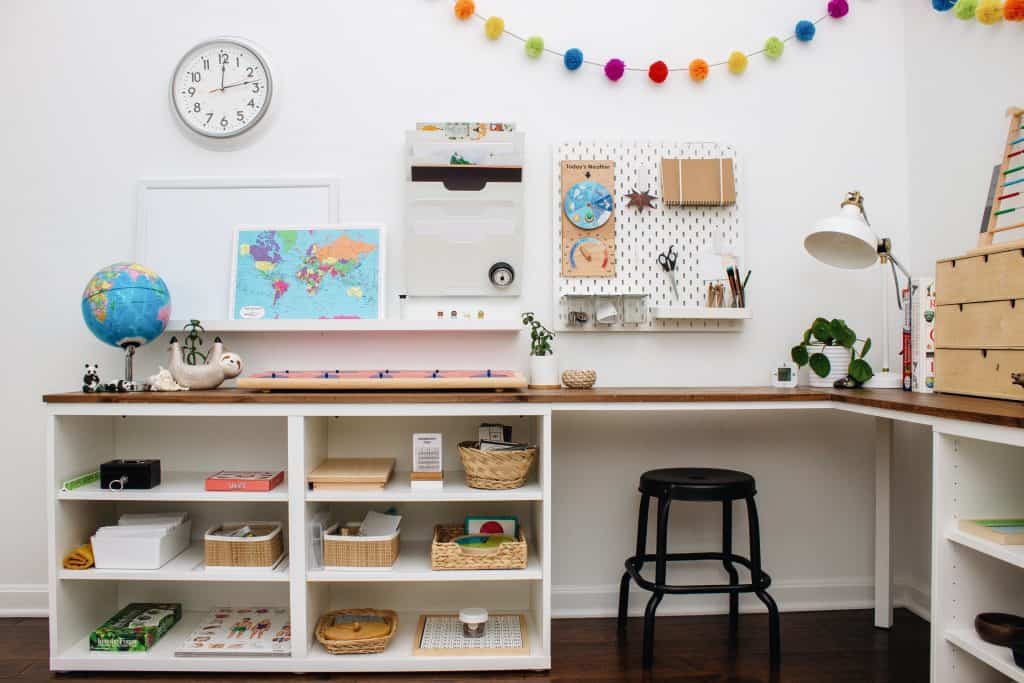
But I did want to provide the girls with a flat surface upon which to work if desired. Lilly, in particular, prefers a desktop when she draws and writes, so it was important to me that the schoolroom provide both working arrangements: a spacious floor area upon which to spread materials out AND a desk area with a nice, smooth surface upon which to write.
DISCLOSURE: THIS POST CONTAINS AFFILIATE LINKS AT NO COST TO YOU. THIS MEANS I MAY RECEIVE A SMALL COMMISSION IF YOU MAKE A PURCHASE USING THESE LINKS.
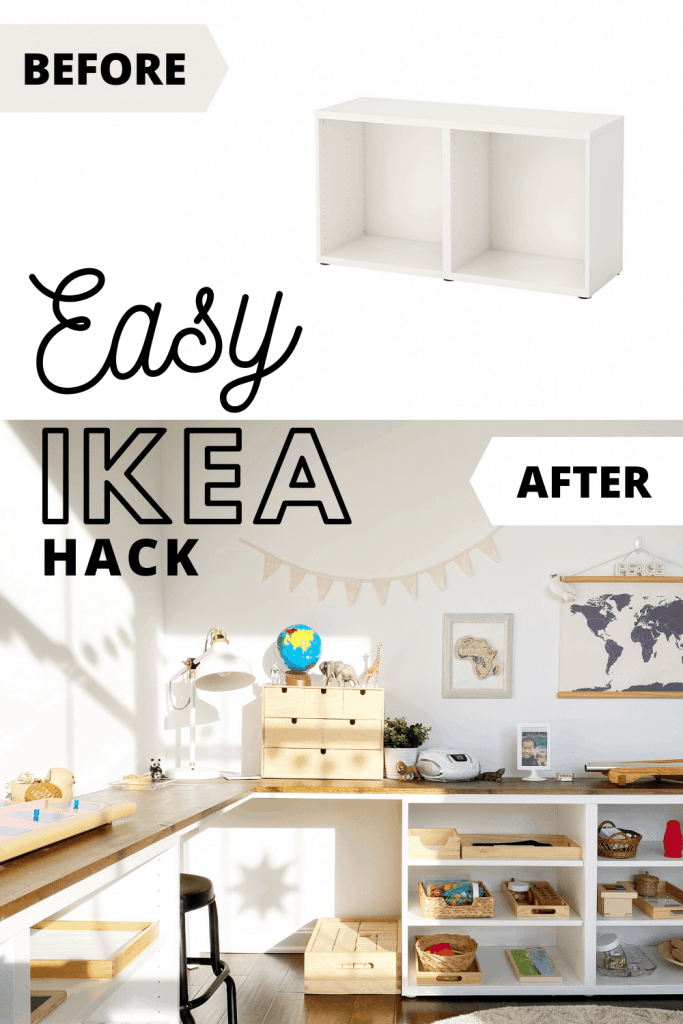
Drawing inspiration from here and here, Eric and I finally settled on creating a corner desktop mounted to our BESTA shelving units from IKEA. First, I ensured that the height wouldn’t be too high to serve as a functional work top and that I could find a stool tall enough for them to work comfortably at the desk. Once I had made sure the height and seating arrangement would work, we then began to source our materials.
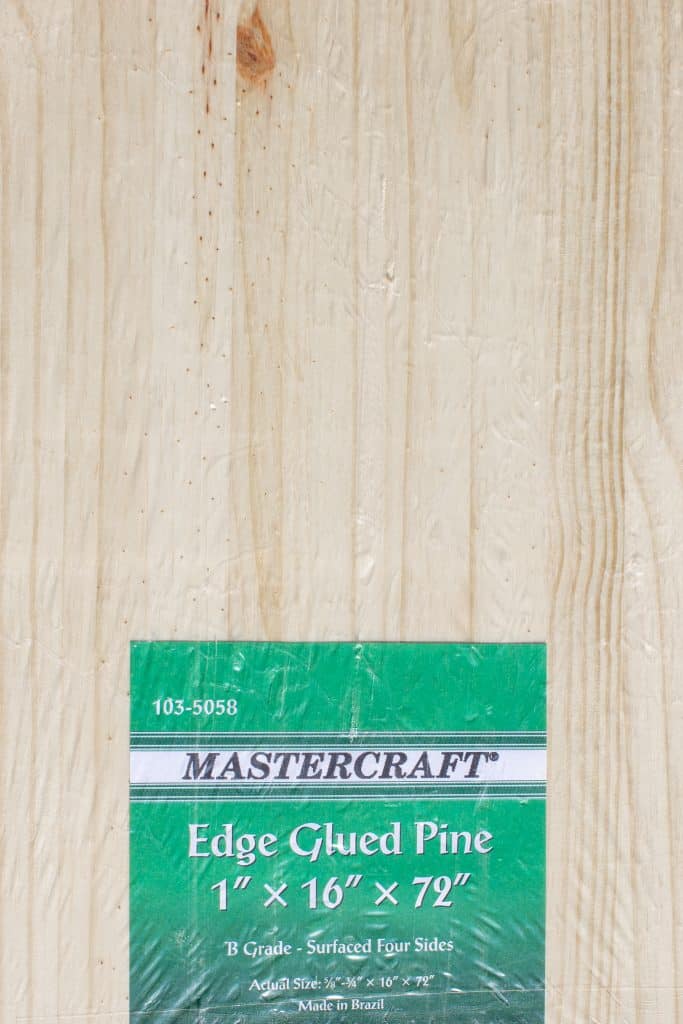
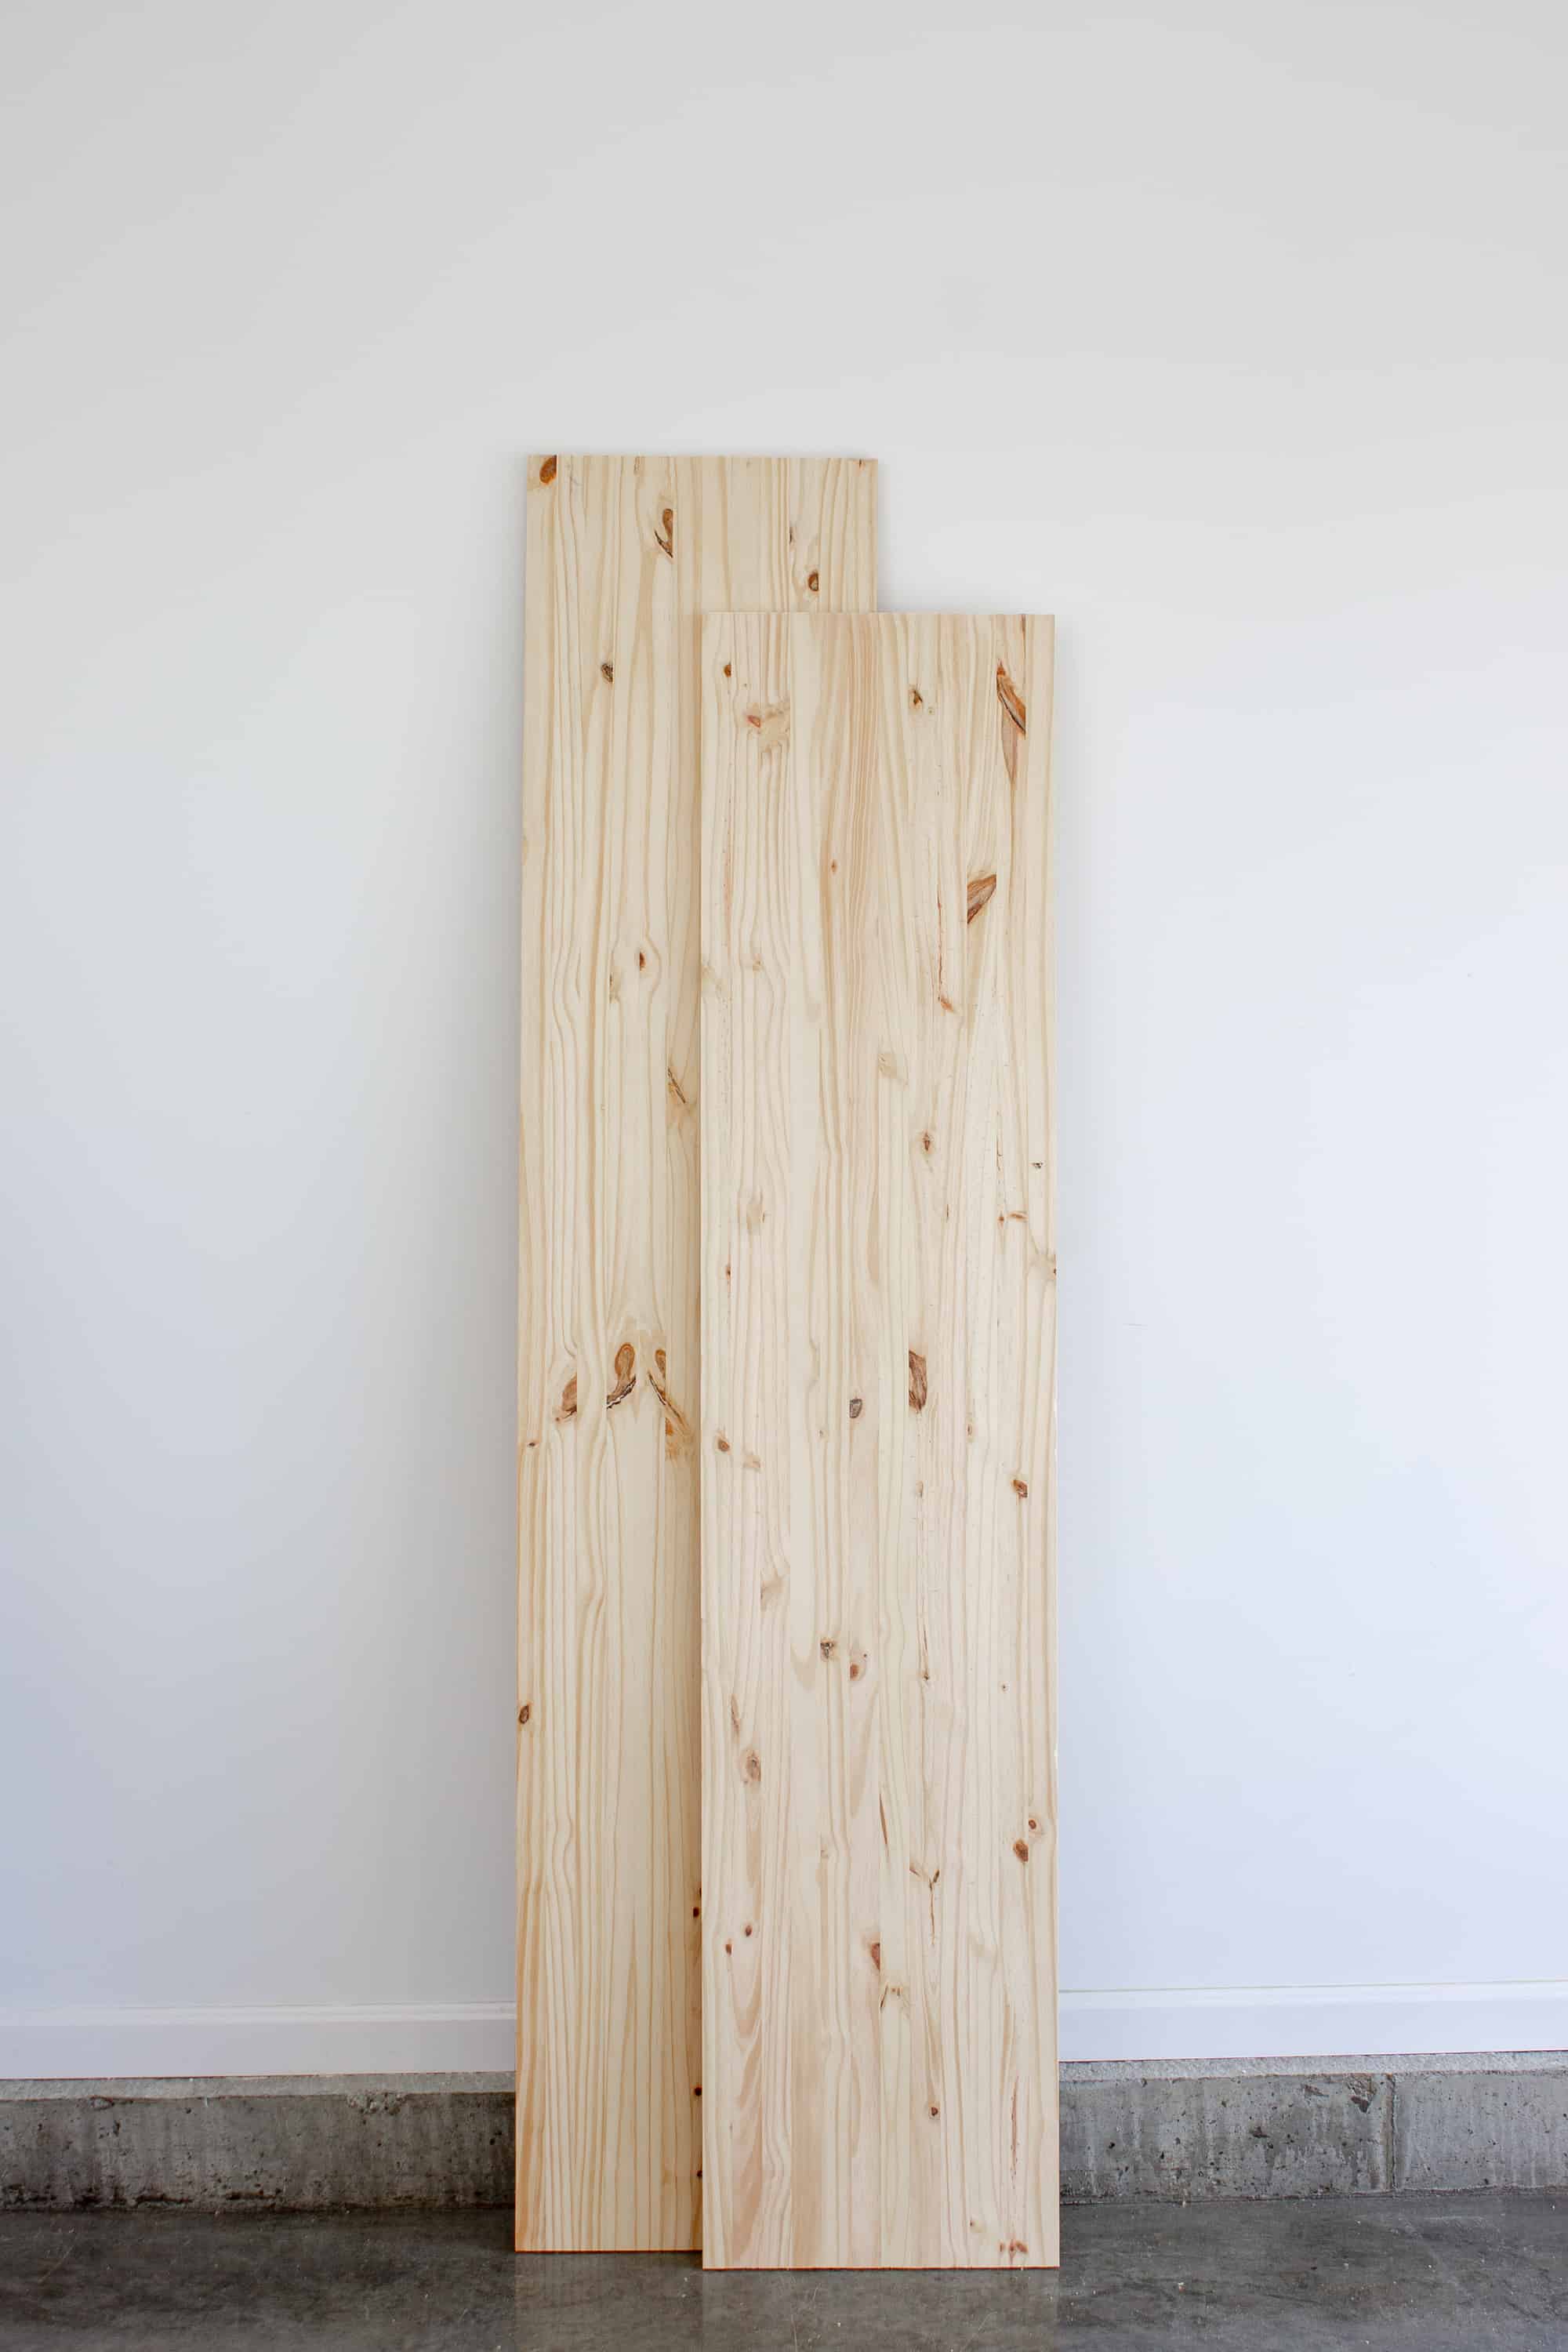
For the desktop itself, I wanted a completely smooth surface. Nothing is more aggravating than a pencil punching through paper due to an uneven work surface! Since the Besta shelves are 15 3/4” depth, we needed at least a 16” depth board. We contemplated using plywood, but while we were at Menard’s one night we came across a 16” depth edge-glued pine board available in both 8’ and 6’ lengths so we bought one of each and brought them home to see how they’d look.
The edges were clean and the surface was smooth so it was a win-win for us.
Originally we planned on mounting the desktop to the wall via braces; however, that meant I wouldn’t be able to easily move the desk out to sweep underneath and it would be a royal pain to recover any lost materials that may roll behind or underneath since we have no intention of enclosing the bottom. Add in that we don’t know if at some point in the future we may need the room to serve as a bedroom again, it made a lot more sense to have the corner desktop serve as a standalone piece. So we opted to use one leg in the corner for additional support and then secure the desktop to the shelving units with an adhesive glue.
After cutting each project panel to the desired length, we used our Kreg Jig to attach the two ends together to form a large L shape.
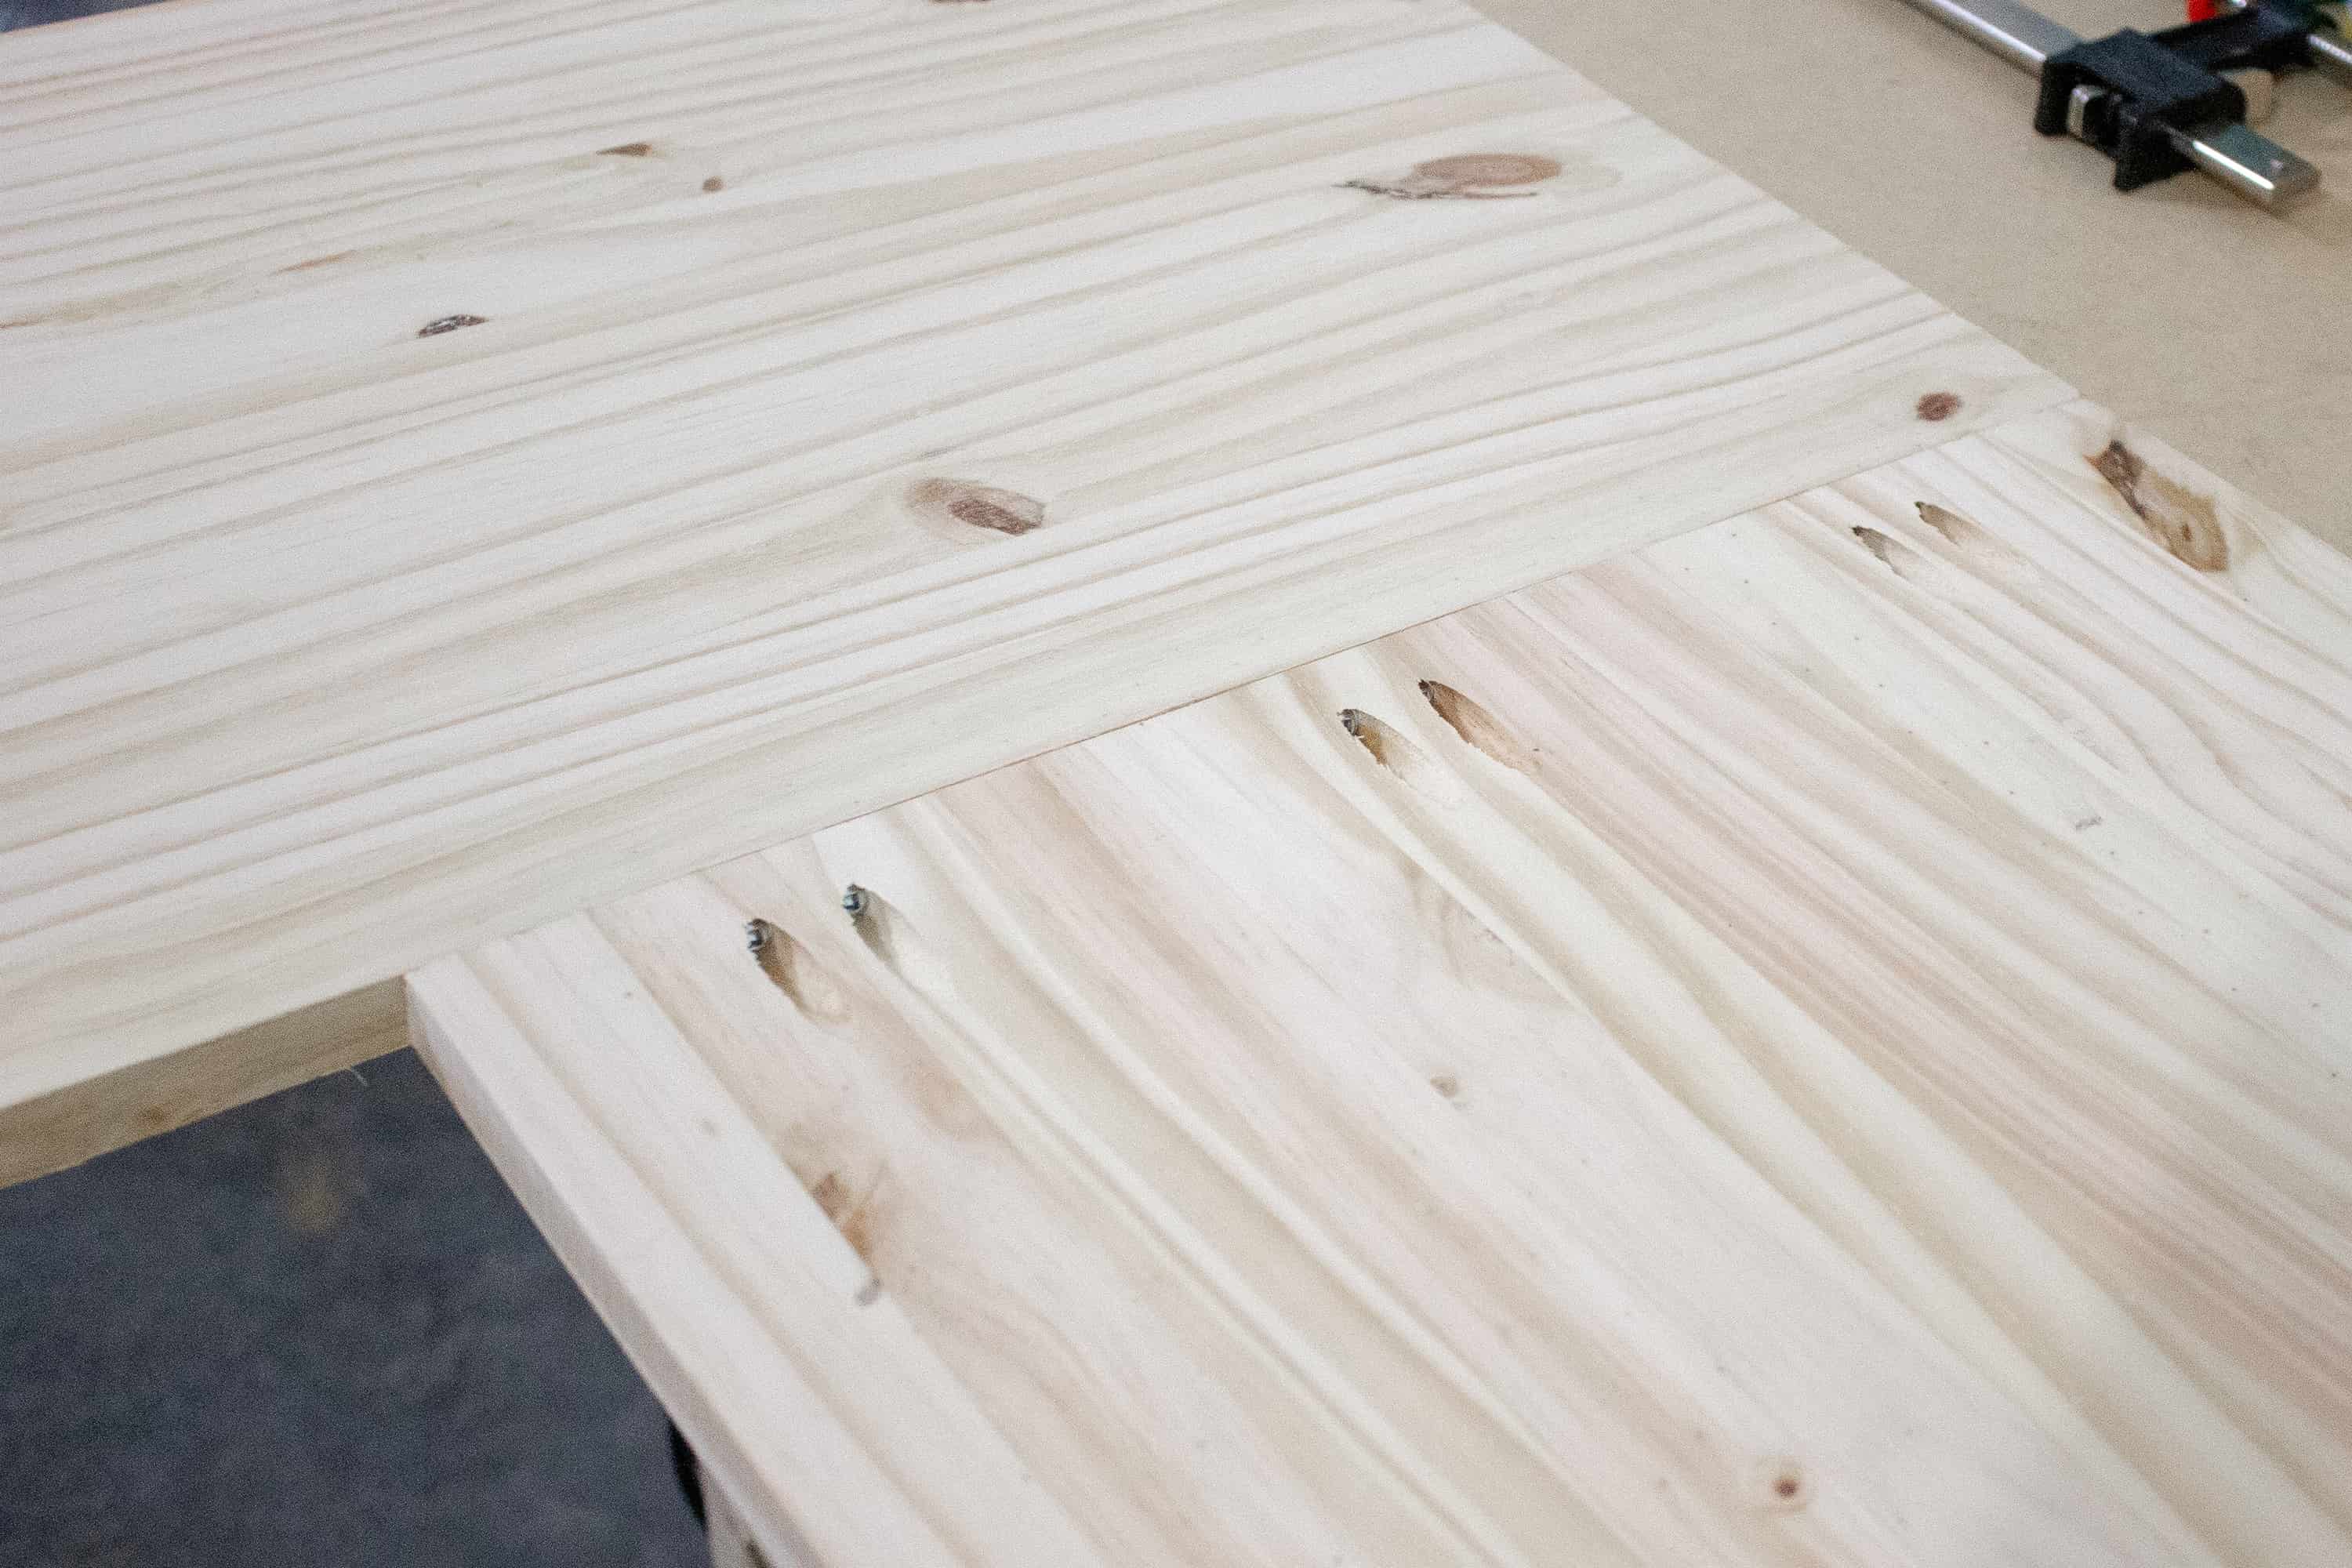
Under normal circumstances I’d recommend using wood glue in addition to the Kreg Jig screws, but in this case we opted for only screws — just in case we decide to move the shelves into another part of the home in the future and needed a quick and easy disassembly.
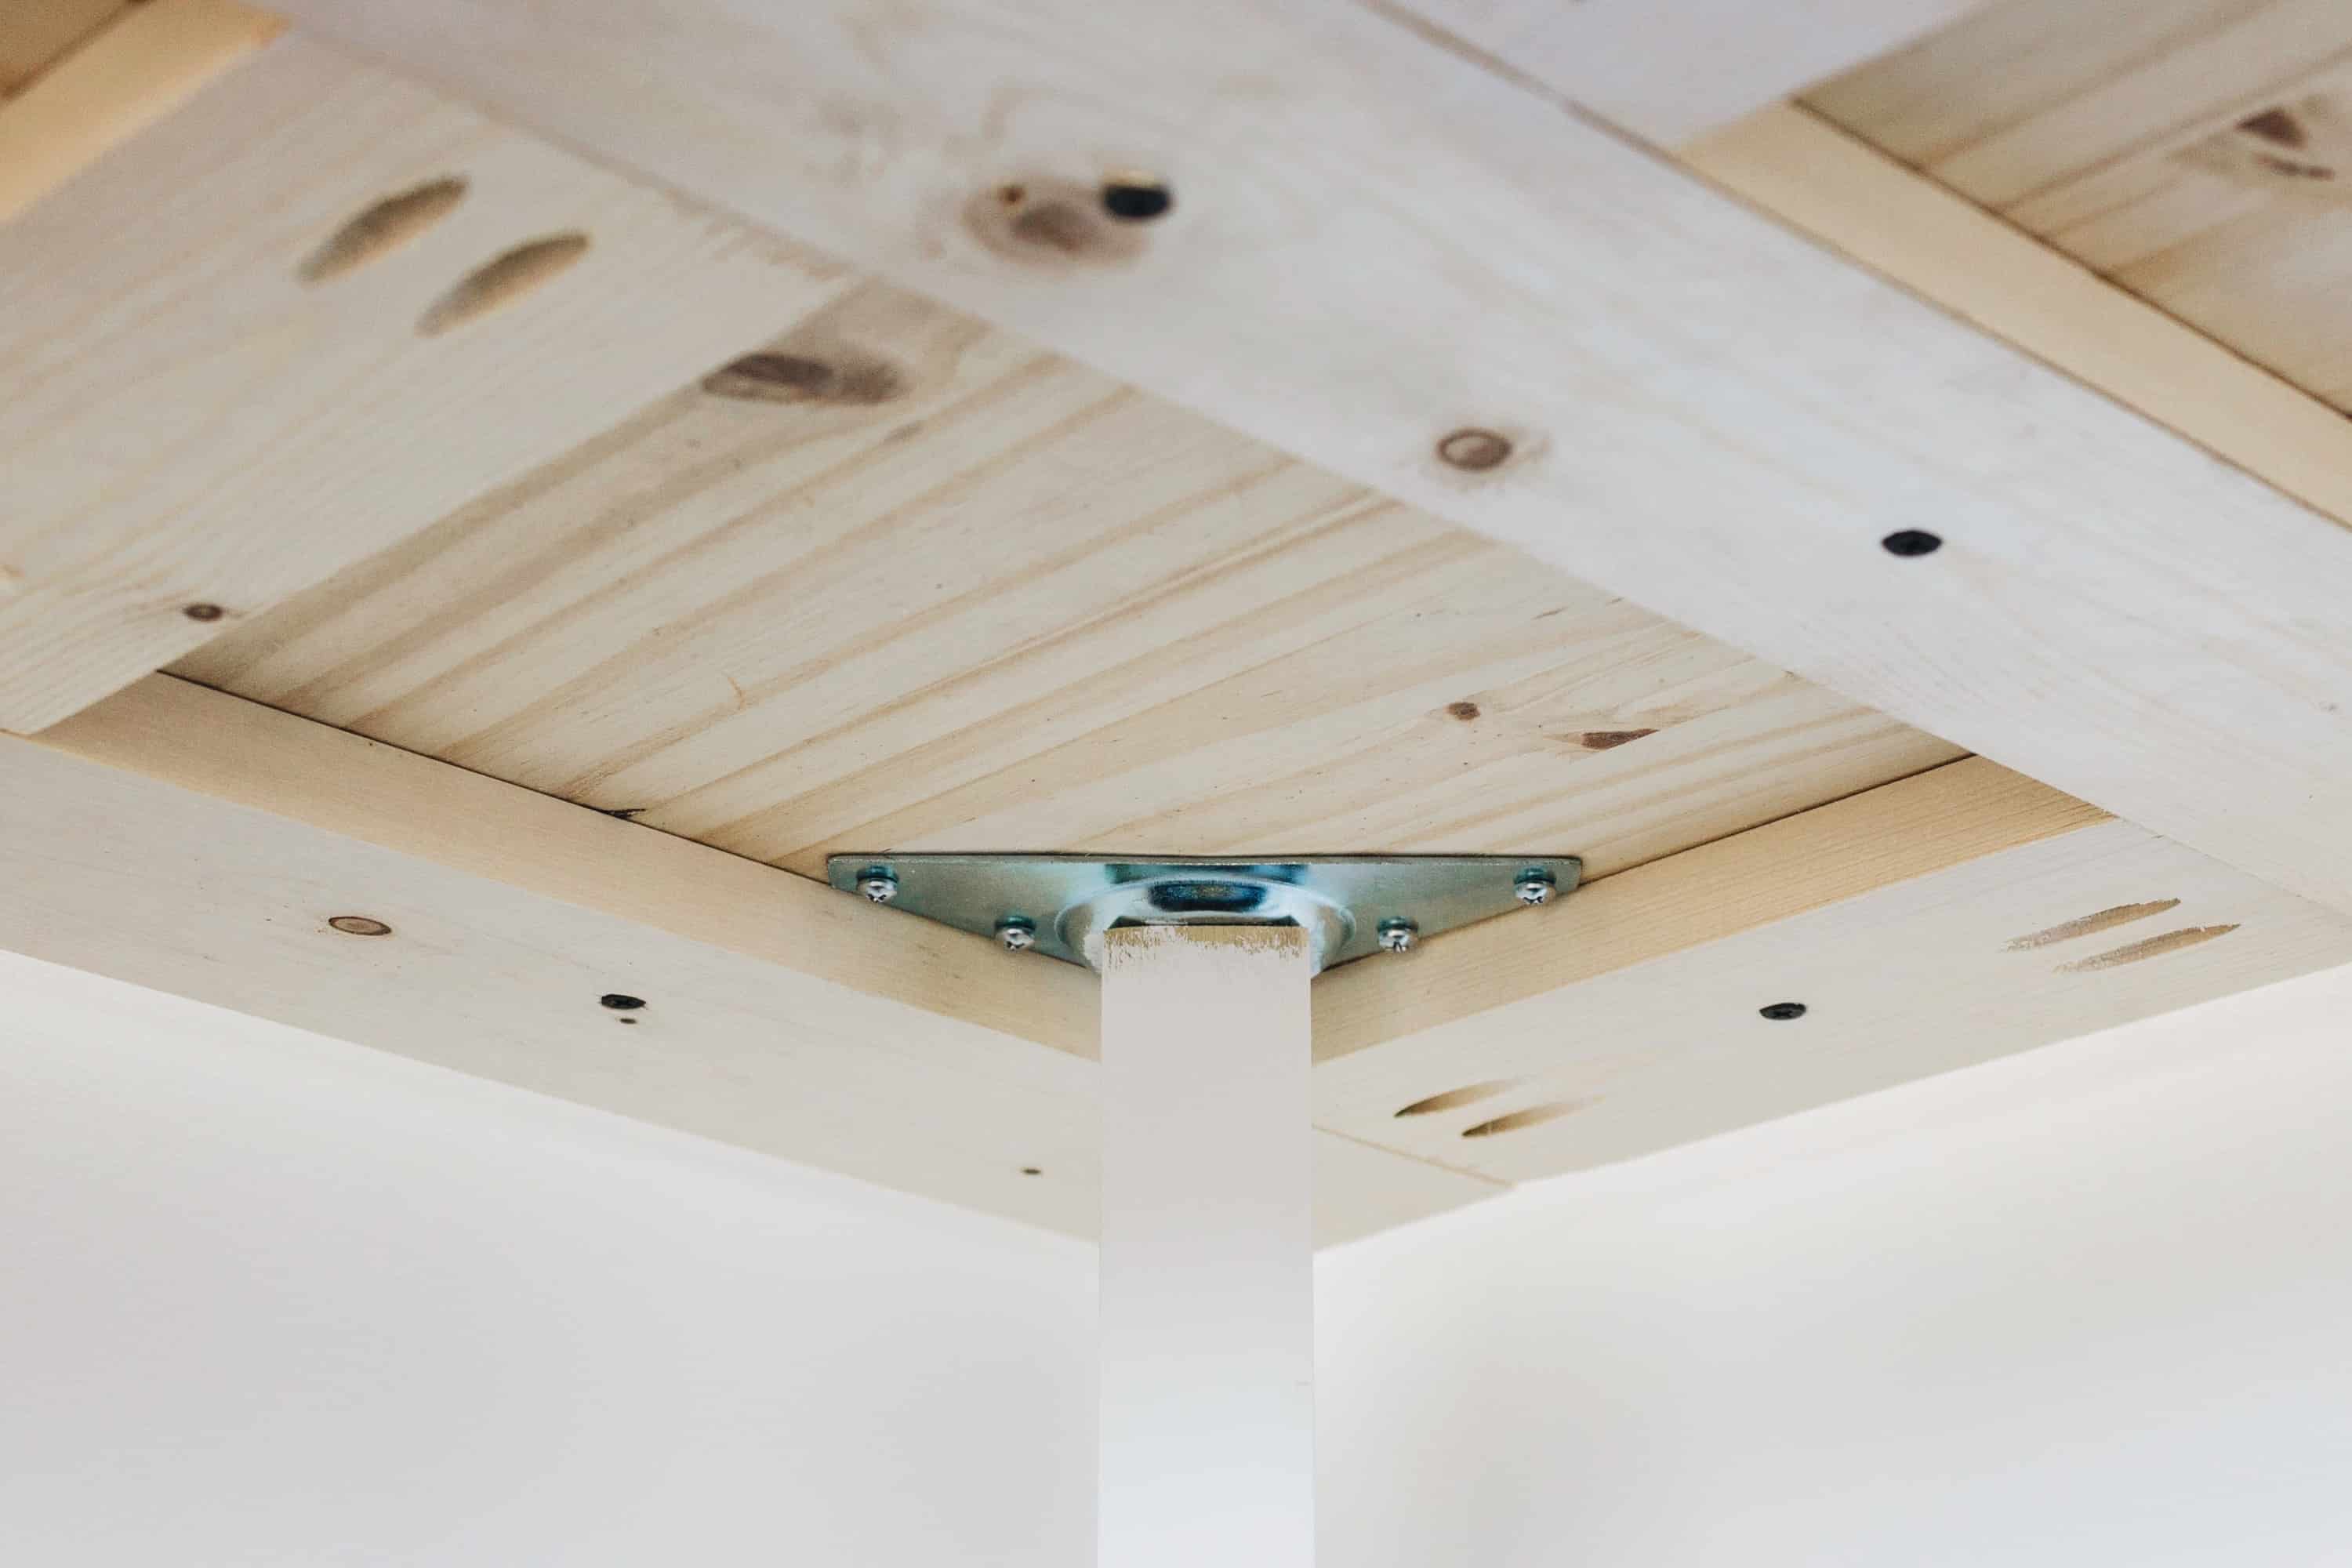
At this point, we carried the desktop into the house to ensure a clean fit and determine the measurements for the subframe. With a toddler in the house, additional support is always beneficial! Eric then built a simple subframe using 1x4s.
Here’s what it looks like from the underside:
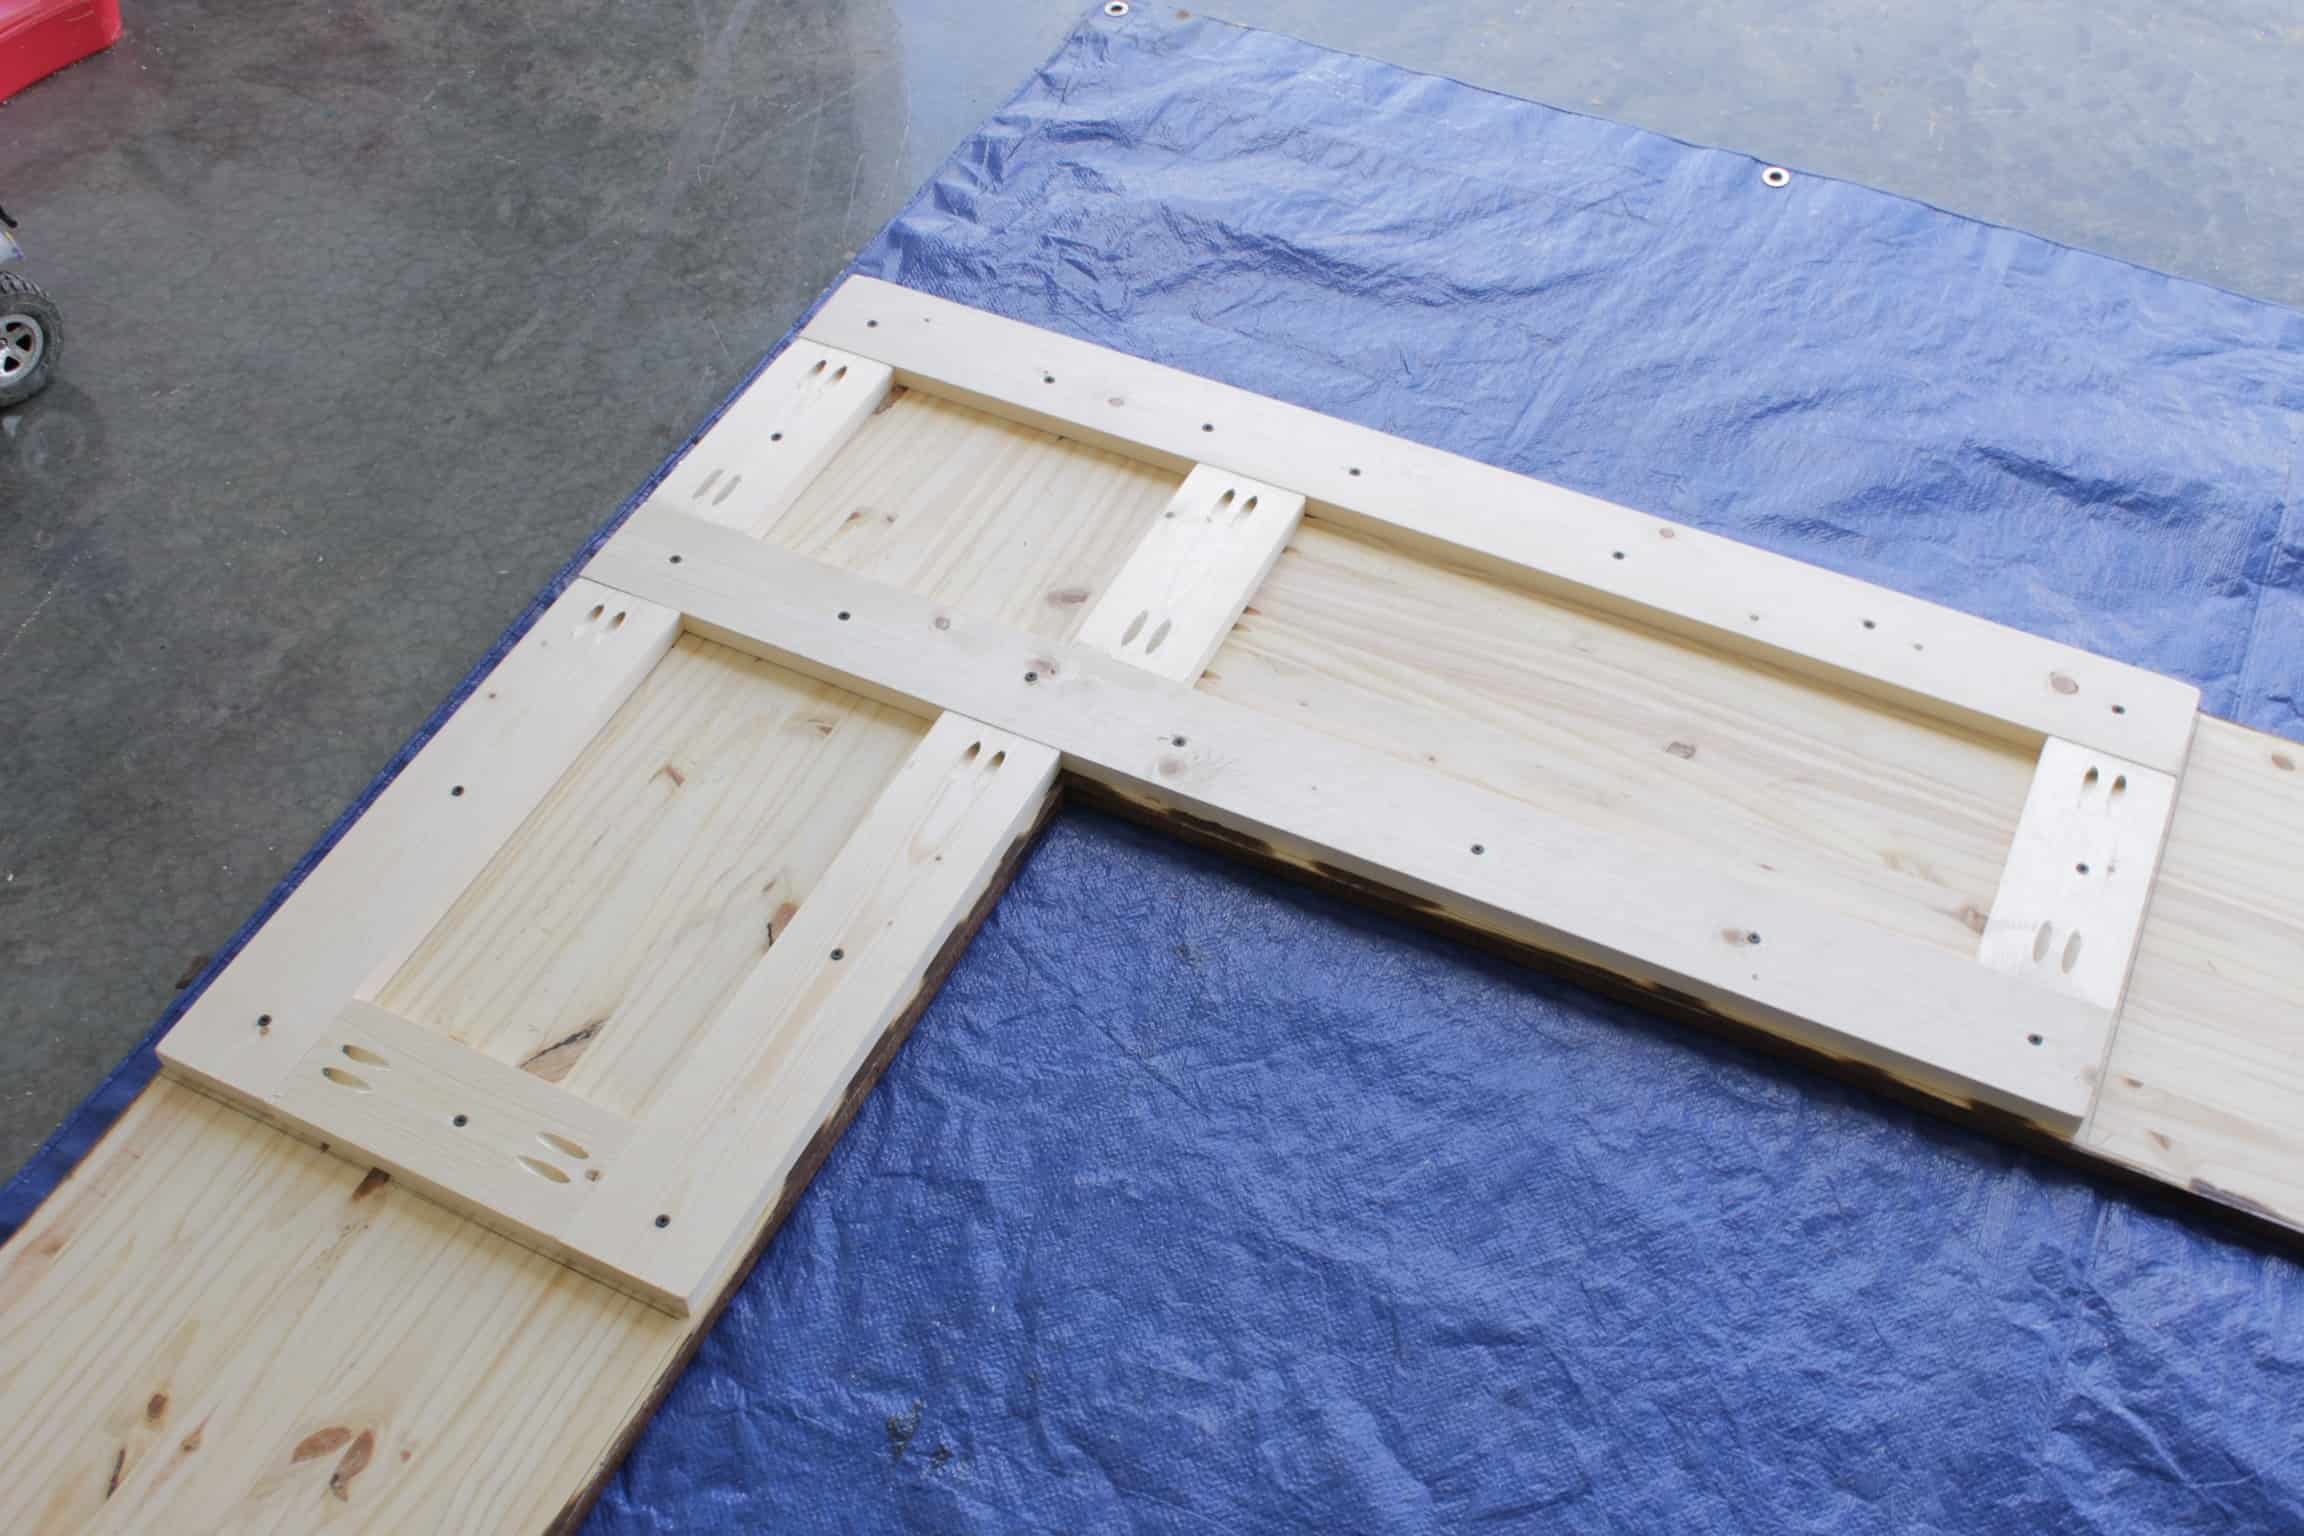
Using a heavy duty top plate bracket, Eric attached a 2×2 leg cut to size in the back corner of the subframe.
For the finish, I applied one coat of wood conditioner followed by 2 coats of Minwax Early American. Then we let it dry for 24 hours before applying 3 coats of Minwax Polycrylic in a matte finish.
Then it was back inside the house to lay it out on top of the Besta shelving units. Once we got the desktop into its proper position, Eric spread Liquid Nails on top of each shelving unit and then tightly clamped the desktop down. We also loaded a bunch of heavy books along the desktop just to make sure it’d all lay flat.
We allowed it to sit for 36 hours before removing the clamps and moving the girls’ materials back onto the shelves.
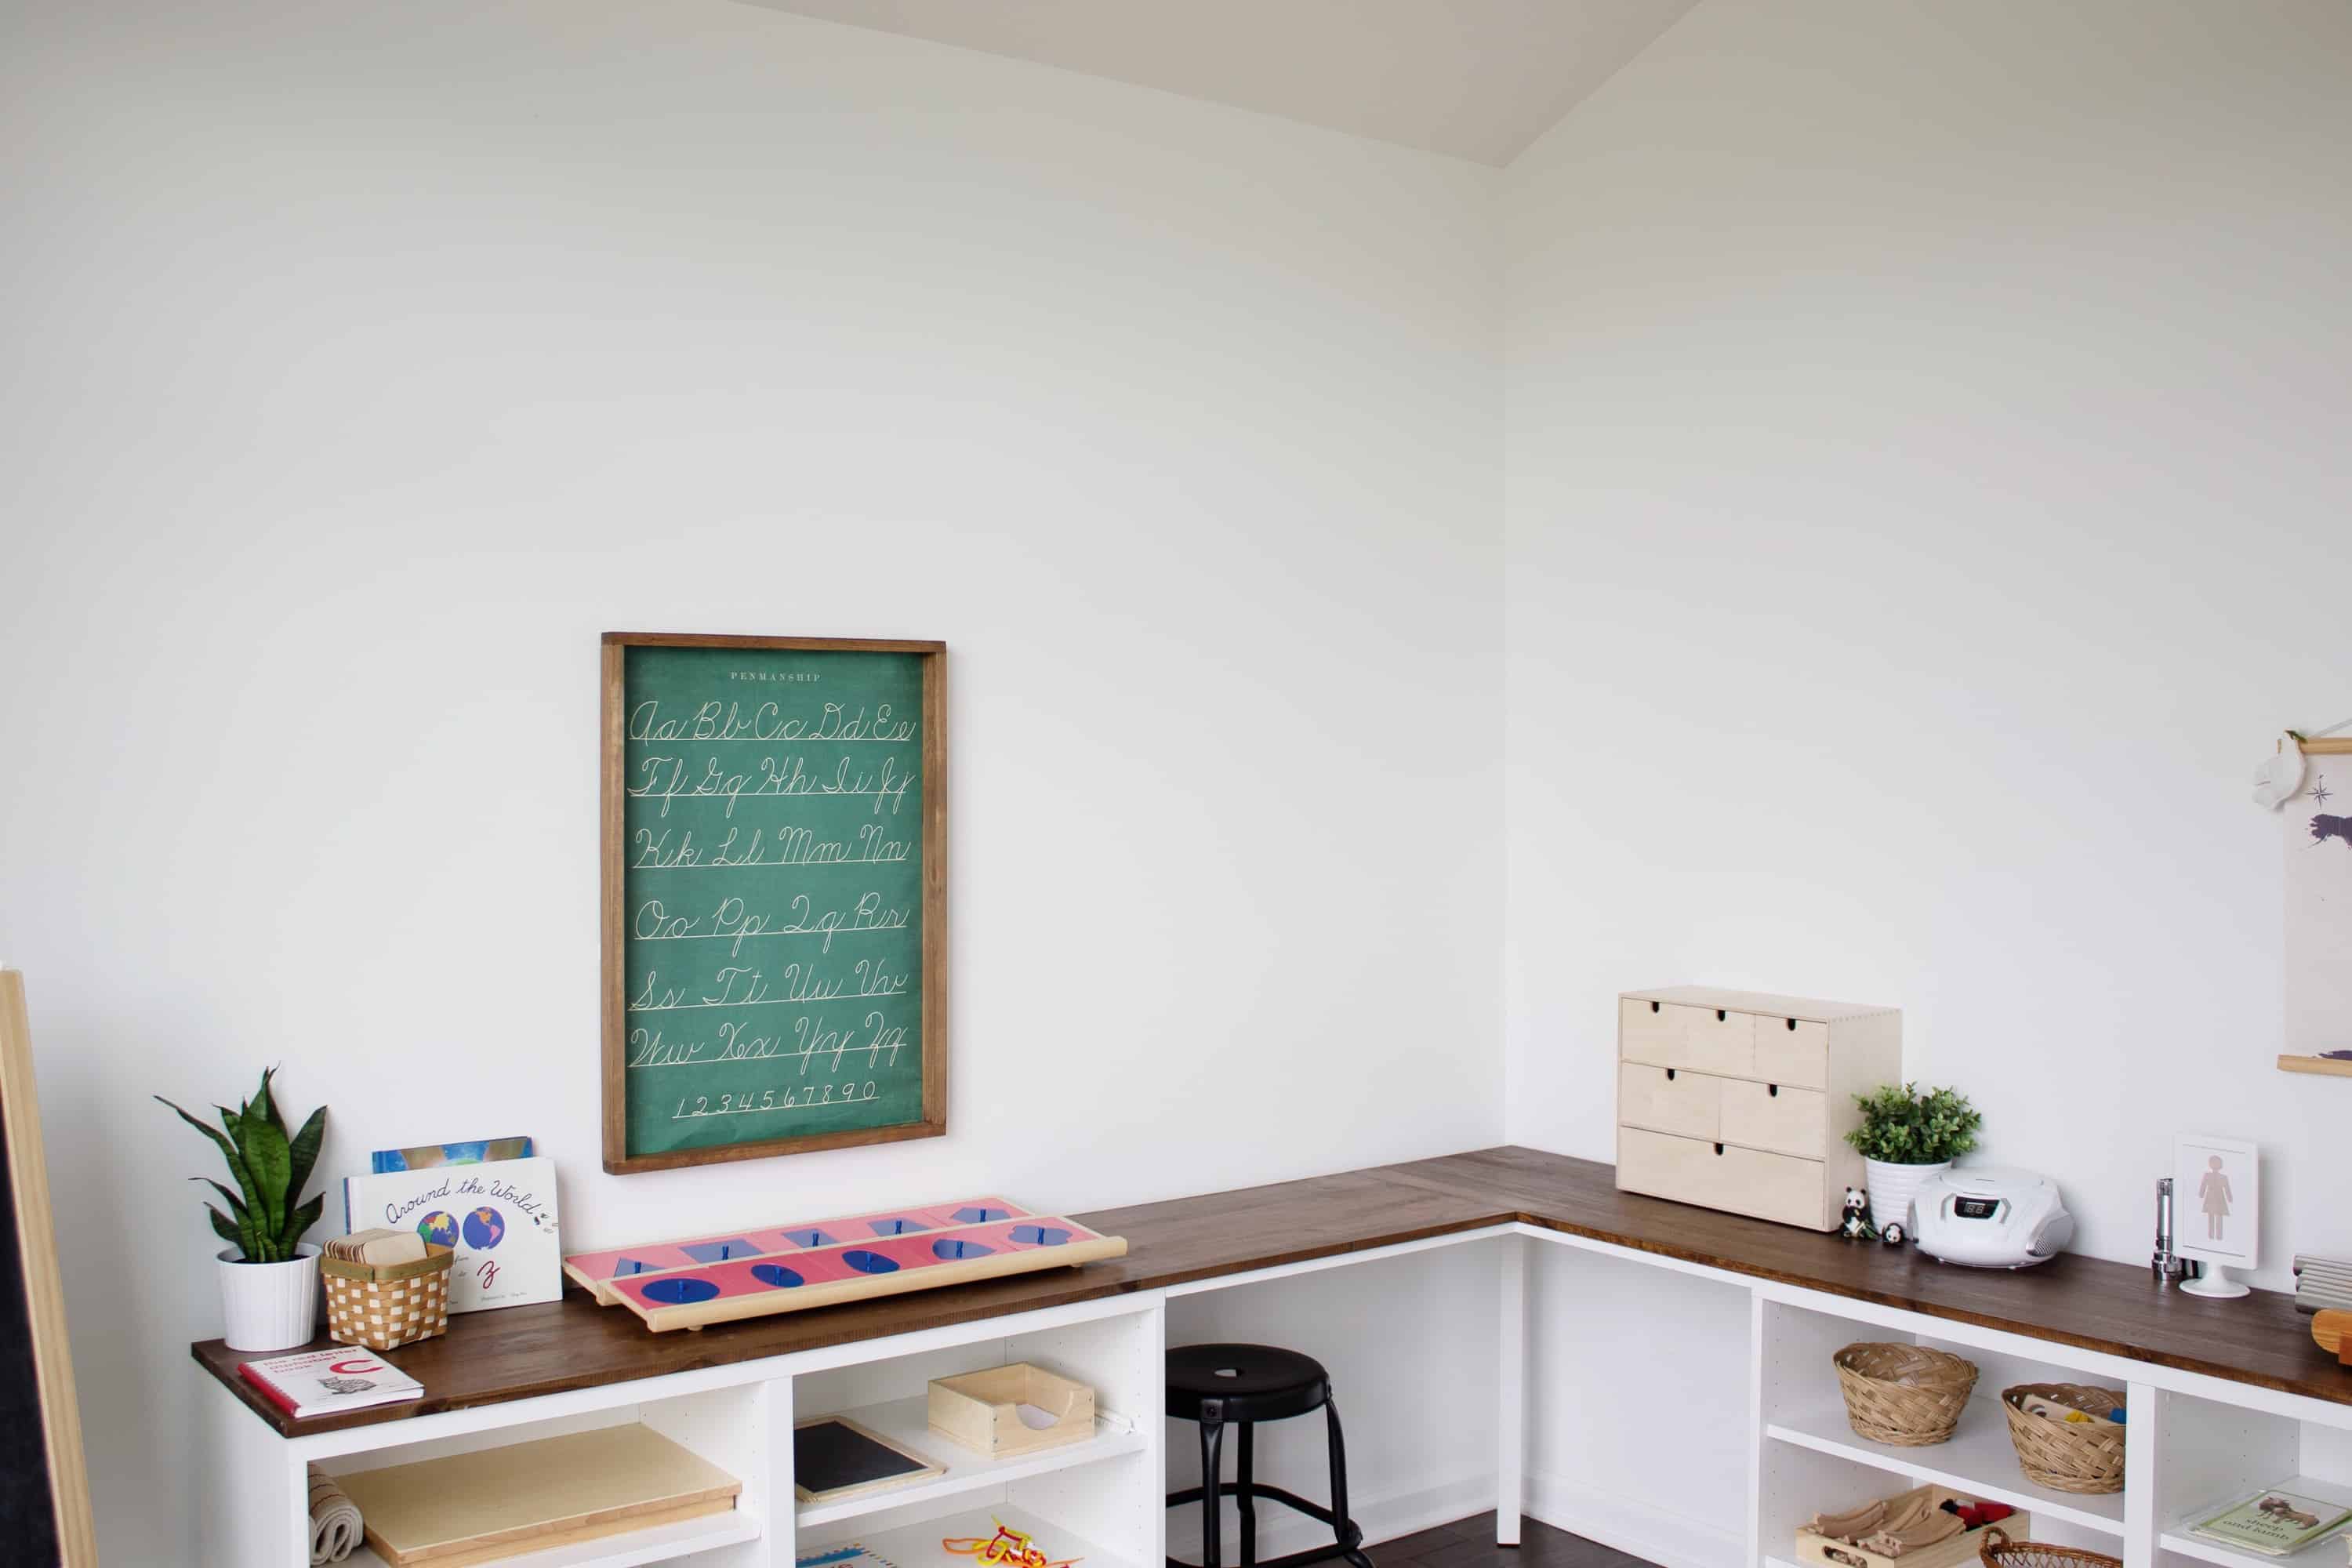
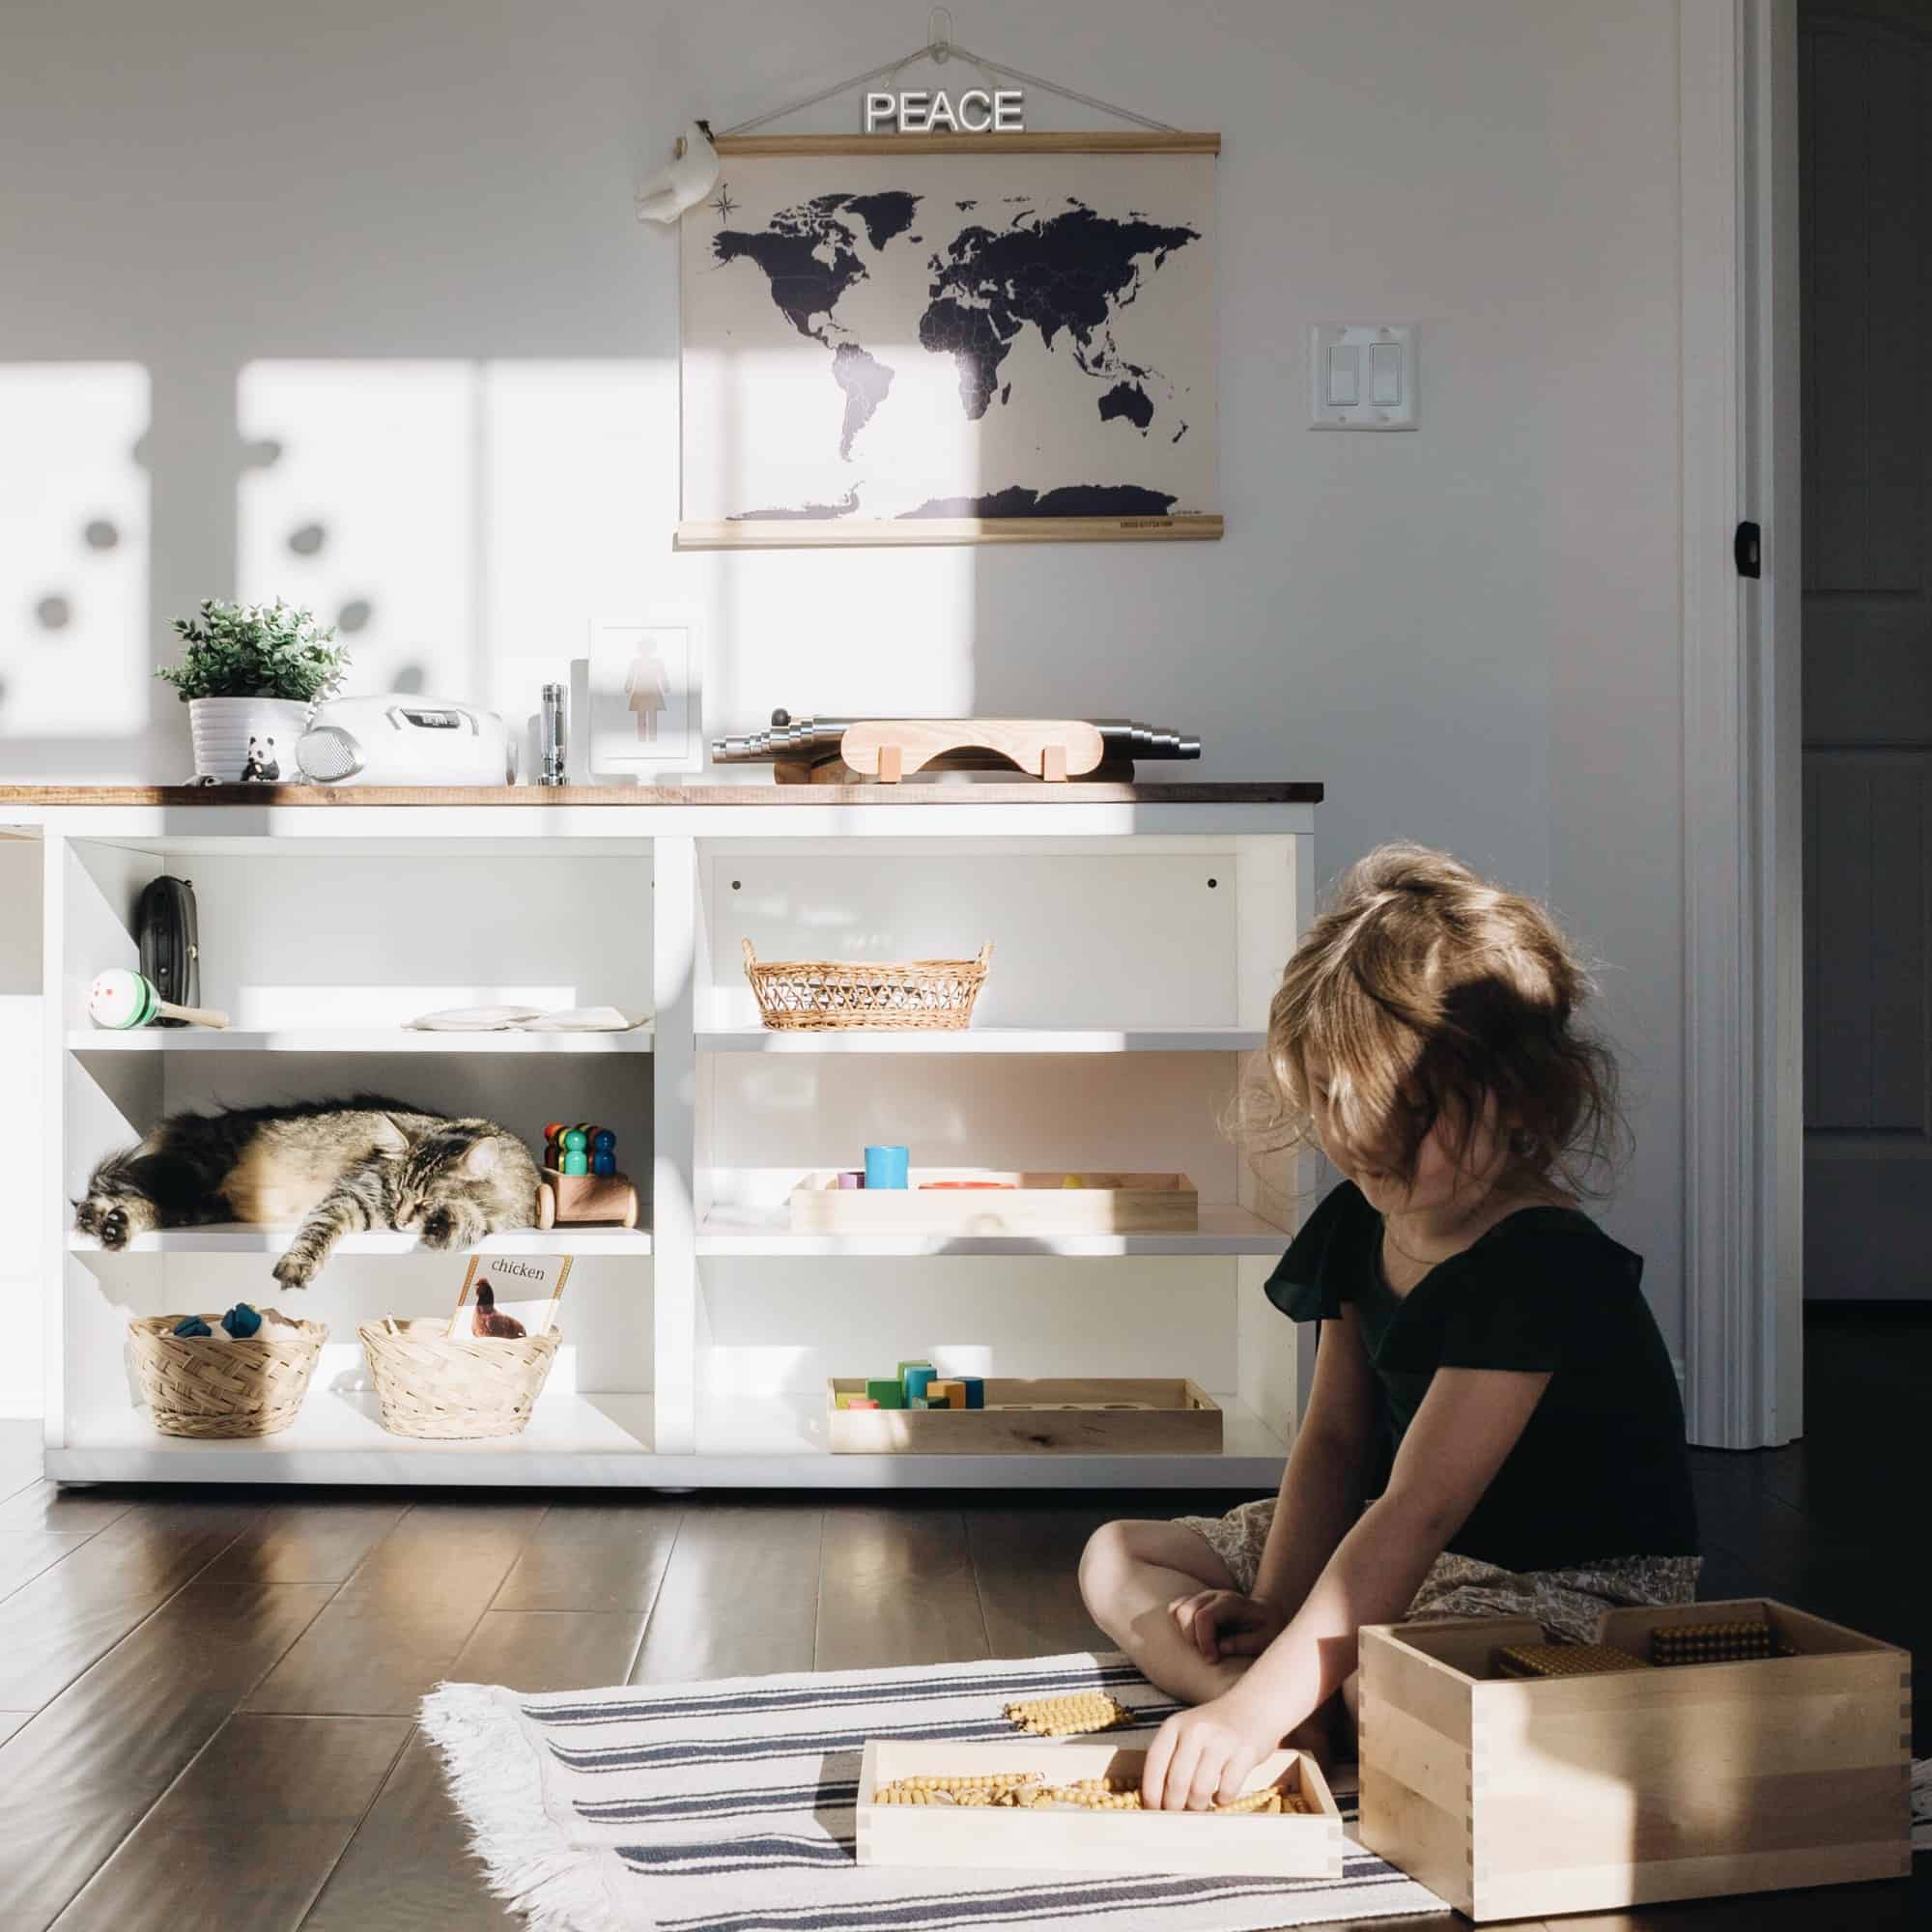
Even our cat likes it…
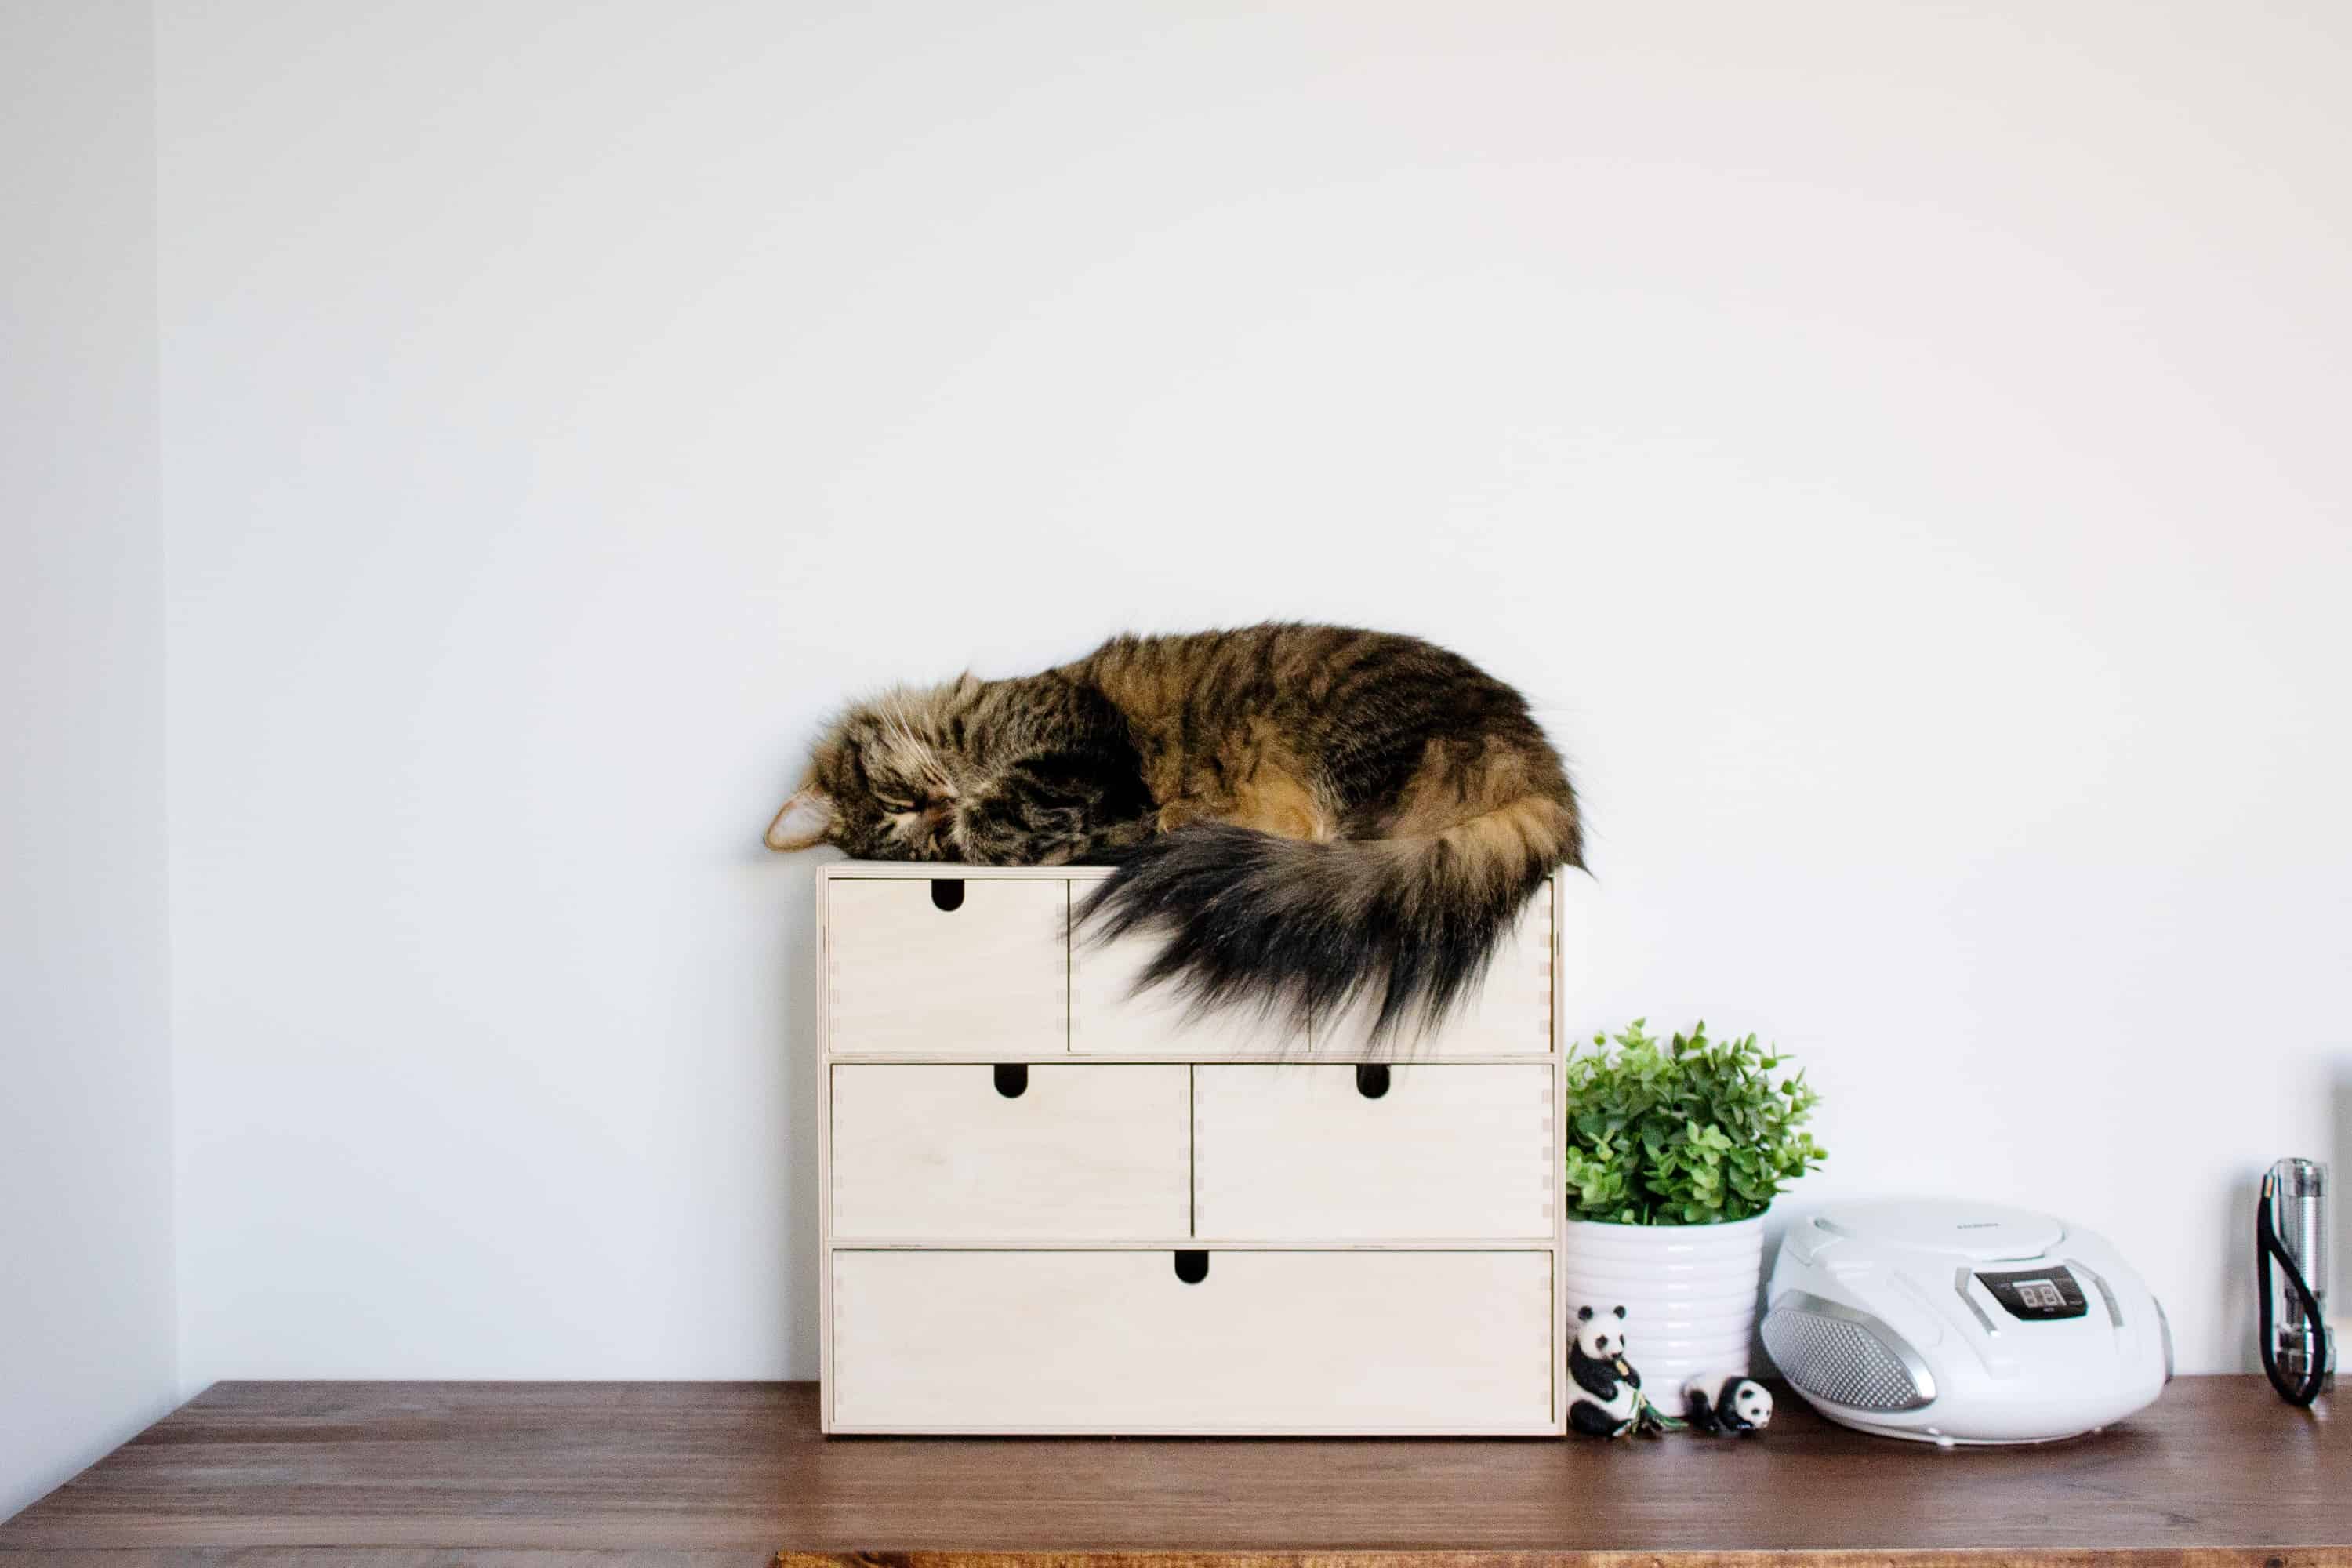
Full disclosure, though, he pretty much likes everything.
Except vacuums. He does not like vacuums.
Overall, I think the desktop will get a lot of use in our homeschool for many years to come.
A Year Later: Click here for a complete tour of our Montessori-inspired schoolroom for two children!
Looking for an adult-size version of this same corner desk? You could easily mount the BESTA frames on the wall to raise the desktop up to a comfortable adult height, too! Swap the leg for a couple wall brackets and simply add doors onto the BESTA frames like we did with our entertainment console in the basement, and you’d have a really sleek and minimal corner desk option for any office space.
Where is the stool from please? Or at least how high is it? This is a brilliant idea for a kids workstation and perfect for our available space. You’ve inspired me!
Hi Lucy! Thanks for your kind words! We purchased the RASKOG stool from IKEA. It’s 17 3/4″ inches high. Hope this helps!
Look at this, and planning to do something very similar. Is the subframe the white under the stained shelf? Do you think this holds up well as a writing surface? I am looking at doing bestas and the 16″ on one side with alex drawer units and a 24″ desk top on the other. Was originally planing to use ikea tabletops but they do not come in the sizes I would prefer….
Yes, we painted the subframe white underneath the stained shelf to blend in with the BESTA units. It’s been working well as a writing surface for our children. They’re now 3 and 6 and we’ve yet to have any problems with it. We made sure to apply a sealant to it so it wouldn’t get marked up. Please let me know if you have any other questions!
Thanks for sharing, this is great! I’m hoping to make something very similar. My space is a bit smaller though so have a question for you. Do your kids ever want to both sit down at the same time? Do their chairs then bump into each other when they back up away from the table? I’m considering making the 2 “desk” spaces more spread out (not in the corner of the L) so that they’re not in each other’s business when both sitting. I’d have to use only single wide besta, and come up with some kind of shelf/storage solution for under the table in the actual corner. Any thoughts/ideas as you’ve actually used the space? I also 3 & 6 (almost 7) yo 🙂
Hi Elena, it’s definitely not wide enough for both children to work side by side. I wished we had the room to have made the desktop longer, but I didn’t want to give up the planned reading nook. Thankfully, they’re pretty good about finding something else to do if the desk part is occupied by another. We have small floor tables and I think that helps with options. Please let me know if you have any other questions!
May I knw where the wall string pompom is from ? It’s lovely !
Hi Valerie! I actually purchased it from Target several years ago.
Hello beautiful space you’ve created. Can you please tell me where you managed to source the lovely wooden boxes and tray boxes on the shelves? Thanks
Hi Linda, most are from either IKEA, Amazon, or thrift stores.